Wednesday, December 25, 2019

Dix 38 Pilot "Spailpin" Antarctic Voyage

The yacht "Spailpin" is a steel Dix 38 Pilot, owned and skippered by Barry Kennedy. She is currently in the Antarctic, on her second voyage to that wild and very remote part of our world.

She was built in South Africa by Luke Fisher as his family cruiser, named "Bryana". He competed in the 1700 mile Governors Cup Race from South Africa to St Helena Island in 2012, with his wife and two teenage children as crew. Barry Kennedy bought her from Luke, renamed her "Spailpin" and made upgrades to ready her for more vigorous sailing adventures than she had done with Luke and family.
As "Bryana, when Luke Fisher owned her.
Wikipedia defiles a spailpin as a wandering landless labourer, an itinerant or seasonal farm worker in Ireland. Others also offer a rascal or layabout as alternatives. Seeing where she is now and how hard she and Barry have worked to be there, I don't think that the "layabout" handle will fit. That said, she did hang out for most of 2019 in the Falkland Islands between her two voyages.
"Spailpin" hanging out in the Falkland Islands this year.
Prior to her Antarctic voyage a year ago, Barry and "Spailpin" cruised the fjords of Patagonia. These photos are from that voyaging to some of the most incredible scenery in the world.


Look carefully and you will see "Spailpin" in the middle of that sea of ice.

Moored to ice.
Serene but very cold near to the bottom of the world.
Two weeks ago Barry and I exchanged emails when "Spailpin" was in port in Ushuaia, Argentina, the most southern city in the world. Barry was preparing and stocking her for her voyage back to Antarctica while waiting for two crew to join him. Since then they have reached Antactica and are anchored in the sheltered waters of Enterprise Island.
Wind patterns over the Southern Ocean on Christmas Day 2019, showing the track of "Spailpin" from Ushuaia, at the top, to her location at the red dot, at Enterprise Island.
Their crossing last year was very rough. This year they had much calmer weather, with only a few hours of gales. When passing Cape Horn it was calm enough for them to anchor and go ashore to visit the lighthouse and memorial. You can follow the travels of "Spailpin" at https://forecast.predictwind.com/tracking/display/Spailpin.

See more about the Dix 38 Pilot and our other designs on our main website or our mobile website.


Monday, December 23, 2019

Electrics on 27ft Sportfisherman "Dedication"

In my last post we had finished pulling cables and hoses through the ducts to their connection points. Most of the cables ended inside the console, coming up from the ducts under the deck. Also into this area came two hydraulic hoses for steering.
A mess of wires and hydraulic hoses, waiting to be connected.
One side wall inside the console is given over to battery switches, breakers and busbars. These were pre-mounted onto a Starboard panel, then the panel was mounted into the console for wiring.
Battery switches, breakers, busbars etc being laid out on the Starboard panel before mounting in the console.
`The main switch panel is mounted under a hinged cover on the outside of the console alongside the helm. This panel was pre-wired with the positive cables, ready for connecting to the power busbar and clearly labelled.
Switch panel pre-wired and ready for mounting in the console.
With those panels in place, Kevin has been closeted inside the console making all of the connections. All connections are soldered then sealed with heat shrink tubing. All wires are clearly labeled with their purposes to help with later maintenance and fault-tracing.
Wiring in progress. The hole in the side of the console at bottom left below the panel connects to the mounting of the starboard forward leg of the tower. Controls for the crows nest helm will run up this leg and through the hardtop.
Switch panel to the right of the helm, protected by the hinged cover. The ignition switch will be in the open space just to the left of the switch panel. Engine throttle and gearshift will be to the right of the helm.
Making some of the hose connections to the tanks, seacocks and pumps can be challenging. Some of them are awkward to reach and to manipulate the hose, clamp and screwdriver one-handed. Long slim arms and supple hands are a big benefit.
This compartment contains the black water holding tank on the left and the fresh water tank on the right. The black fitting against the other side of the compartment is the Y-valve to control output from the holding tank to either the pump-out or the seacock. Inside this compartment there are five 32mm hose connections, two of 1" and two of 3/4". The order of connecting must be planned because some of the hoses block access to other fittings if done first. 
This design is not yet on our website. Visit our main website or our mobile website to see our other designs.

Sunday, December 8, 2019

Tower on the 27ft Sportfisherman

The tower has now been installed on Kevin Agee's 27ft sportfisherman "Dedication", bolted to the deck, console and leaning post. Tubes connecting to top and each side of the console will take wiring and control cables up to the hardtop for engine controls, radar etc.
The tower being test-fitted, with some of the joints tack-welded in position on the boat, to ensure correct fit.
The tower was returned to the workshop for final welding. Here it is back at the boat for final installation.
Tower being test-fitted in place, tack-welded at joints that are critical for proper fit. The hardtop will be bolted to the top of this framework.
This is the crow's nest, which will be a flying bridge on top of the hard-top for fish-spotting. The front feet are hinged and the rear feet secured with removable pins. This will allow the whole structure to fold forward to a stowed position in front of the tower, reducing overall height for road travel.
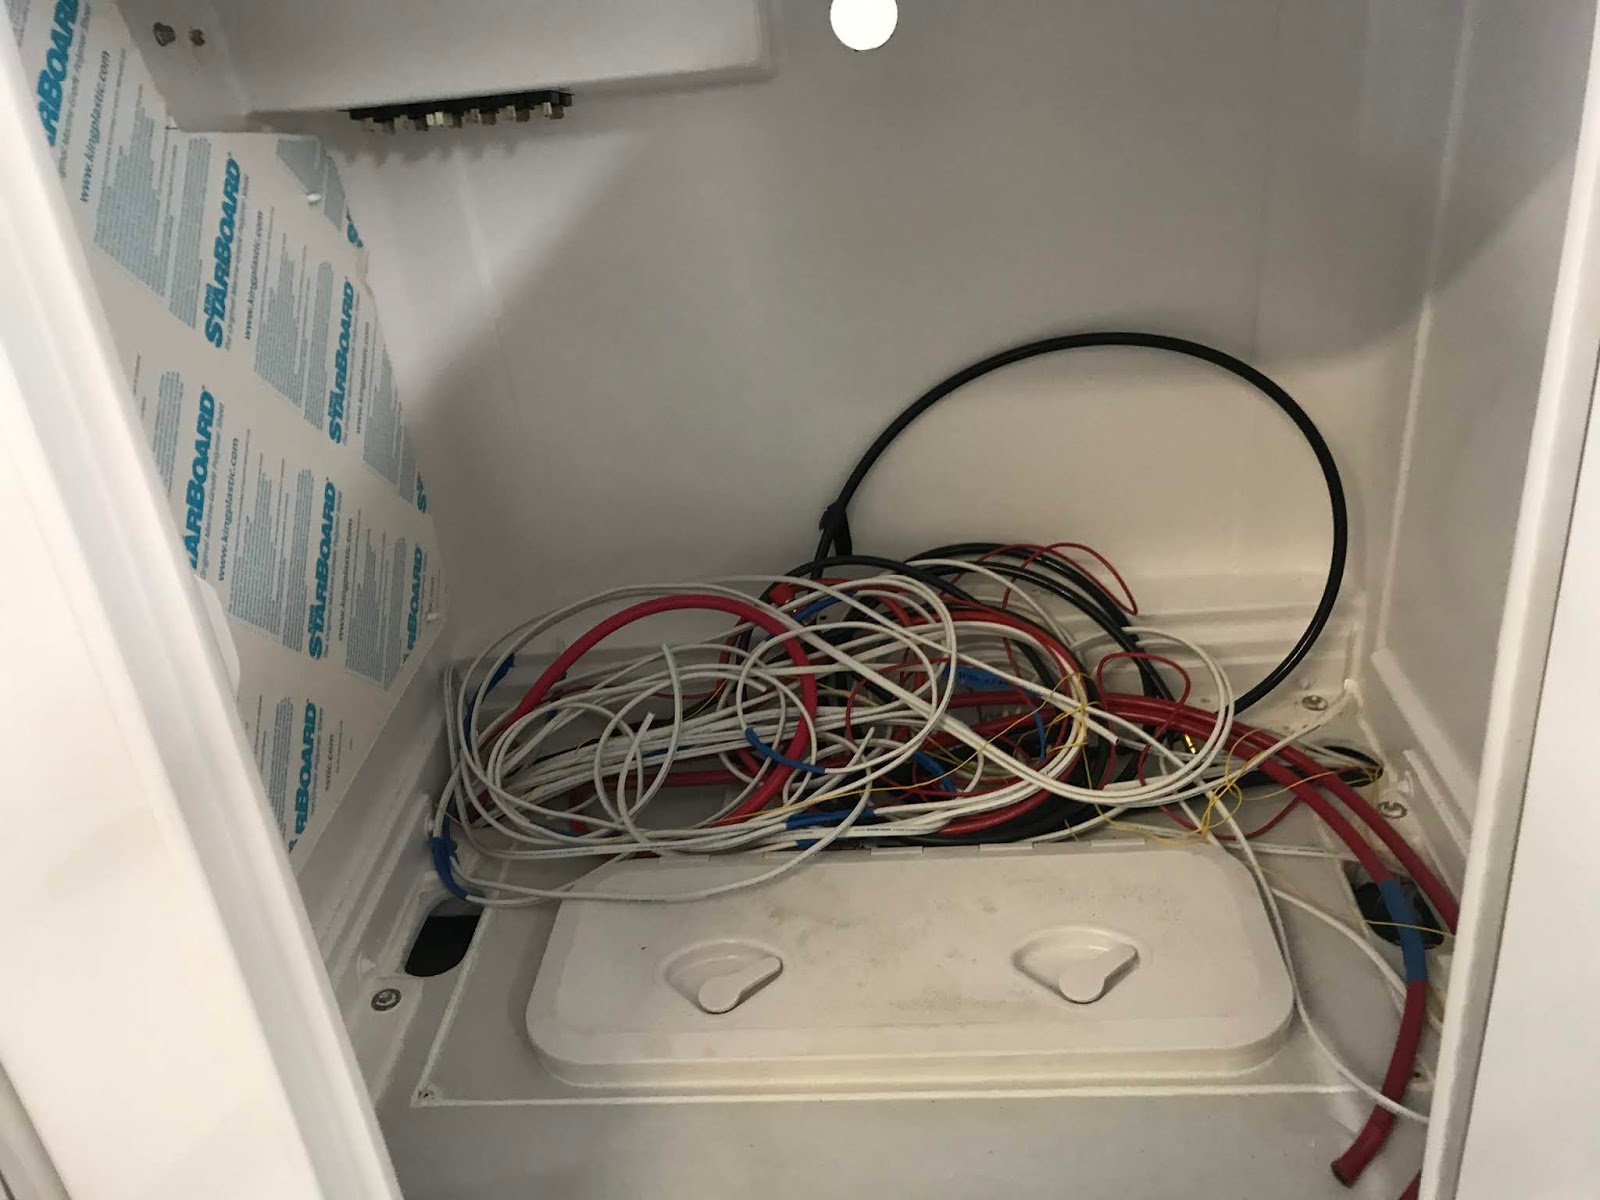
Recent weekends we have been pulling electrical cables, plumbing hoses and hydraulic hoses through the PVC ducts that run under the wet deck.

We ran the hoses first. Being stiff and relatively large, they could be pushed through the ducts and pulled out at the correct under-deck compartment to connect to pumps, tanks or skin fittings. They had to be helped with an electician's snake to lead them along the correct route. They tended to catch at steps in the inside surface of the ducts at joints between the pipes and the bends and junctions that formed the ducts. The solution was to cut the ends of the hoses at an angle of about 30 degrees to form a taper that could more easily pass the catch points and pass by other hoses that were already in the ducts.

By the time that the cables went in, after the hoses, there were more obstructions to negotiate. We pulled them through the ducts with the electrician's snake, in bundles. We formed a long taper on each bundle by taping them together with the ends stepped back in about 6" increments. So as to not form a fat bundle that would need to find or force a large opening past the obstructions, we taped each new cable to another single cable instead of to the whole bundle. This allowed the cables to spread out and flatten, to fit through narrow spaces. Coating the ends of hoses and cables with dish-washing liquid made them slippery and more easily able to slide through.

Installation of electrical and electronic equipment has started.
Console electronics installed. Just above the radios is a cubby locker and the slightly raised rectangular flat surface below the radios will have recessed cup-holders.
Same view, with covers off. The electrical switch panel is at lower right, concealed under the hinged cover. The open space to the left of the switch panel is where the ignition key-switch will be located, also under the cover. Engine controls will be to the right of the helm.
See our full range of boat designs at out main website or our mobile website. You won't find this design there yet, I am still finding time to finish the drawings.