The fish box of Kevin Agee's 26ft sportfisherman is progressing nicely. When planning this part of the boat the conflicting needs for efficient cockpit drainage, storage lockers, access to seacocks and maximising fish box capacity must be worked out and different solutions might be settled on for different boats. For Kevin's boat we have constructed the insulated fish box across most of the transom width, with a locker at each and and a toe-kick recess at the bottom.
The choices for the cockpit drains were going through the sides of the hull forward of the fish box, fitting drain pipes through to the transom or building ducts for the same purpose. We chose to build ducts as a good way to have large capacity drains while also being able to shape them to go around the access covers over the compartments below. This also allowed us to hide the drains under the wings of the outboard engine bracket on the outside and in the toe-kick recess of the lockers on the inside.
 |
| Basic fish box structure roughed in. The gaps at the ends of the toe-kick recess are for the drains. |
 |
| Plywood components forming the ducts to feed water through to the transom drains. |
 |
| Completed drain duct. The large hole will be covered by an access cover. The ball valve is for the fish box drain and will connect to a spigot into the duct. |
 |
| Fish box constructed with plywood liner and foam slab insulation. Epoxy filleted at all corners. |
The side decks were next on the build list. This started with fitting the light framing that defines the shapes of curves of the upper and lower edges of the side deck fascias. With these glued in and held to their required shapes by the side frames and gussets, the fascias were cut and fitted first, followed by the side decks. I was designing for this work to be done in marine plywood but this can be replaced by Coosa board. Kevin has chosen to do the decks in Coosa, fibreglassed both sides.
 |
| Cleats at top and bottom of the fascia define the shapes of fascia and deck. We added two gussets between frames, to shape the sheer break and to hold the cleats parallel to the sheer curve where it turns in aft due to the tumblehome. |
 |
| At the sheer break the relatively straight aft cleats (glued in first) must be held firmly in their correct positions, so that the heavily curved forward cleats can be trimmed to come in at the correct angle and position, then glued. This is done with the gusset seen in the photo, which stays in place as permanent structure. |
 |
| Coosa fascia and side deck dry-fitted to test for it. The fascias were cut as straight strips then flexed into place. The side decks were cut to the required shapes. All panels were then glassed on the back face before fitting. |
 |
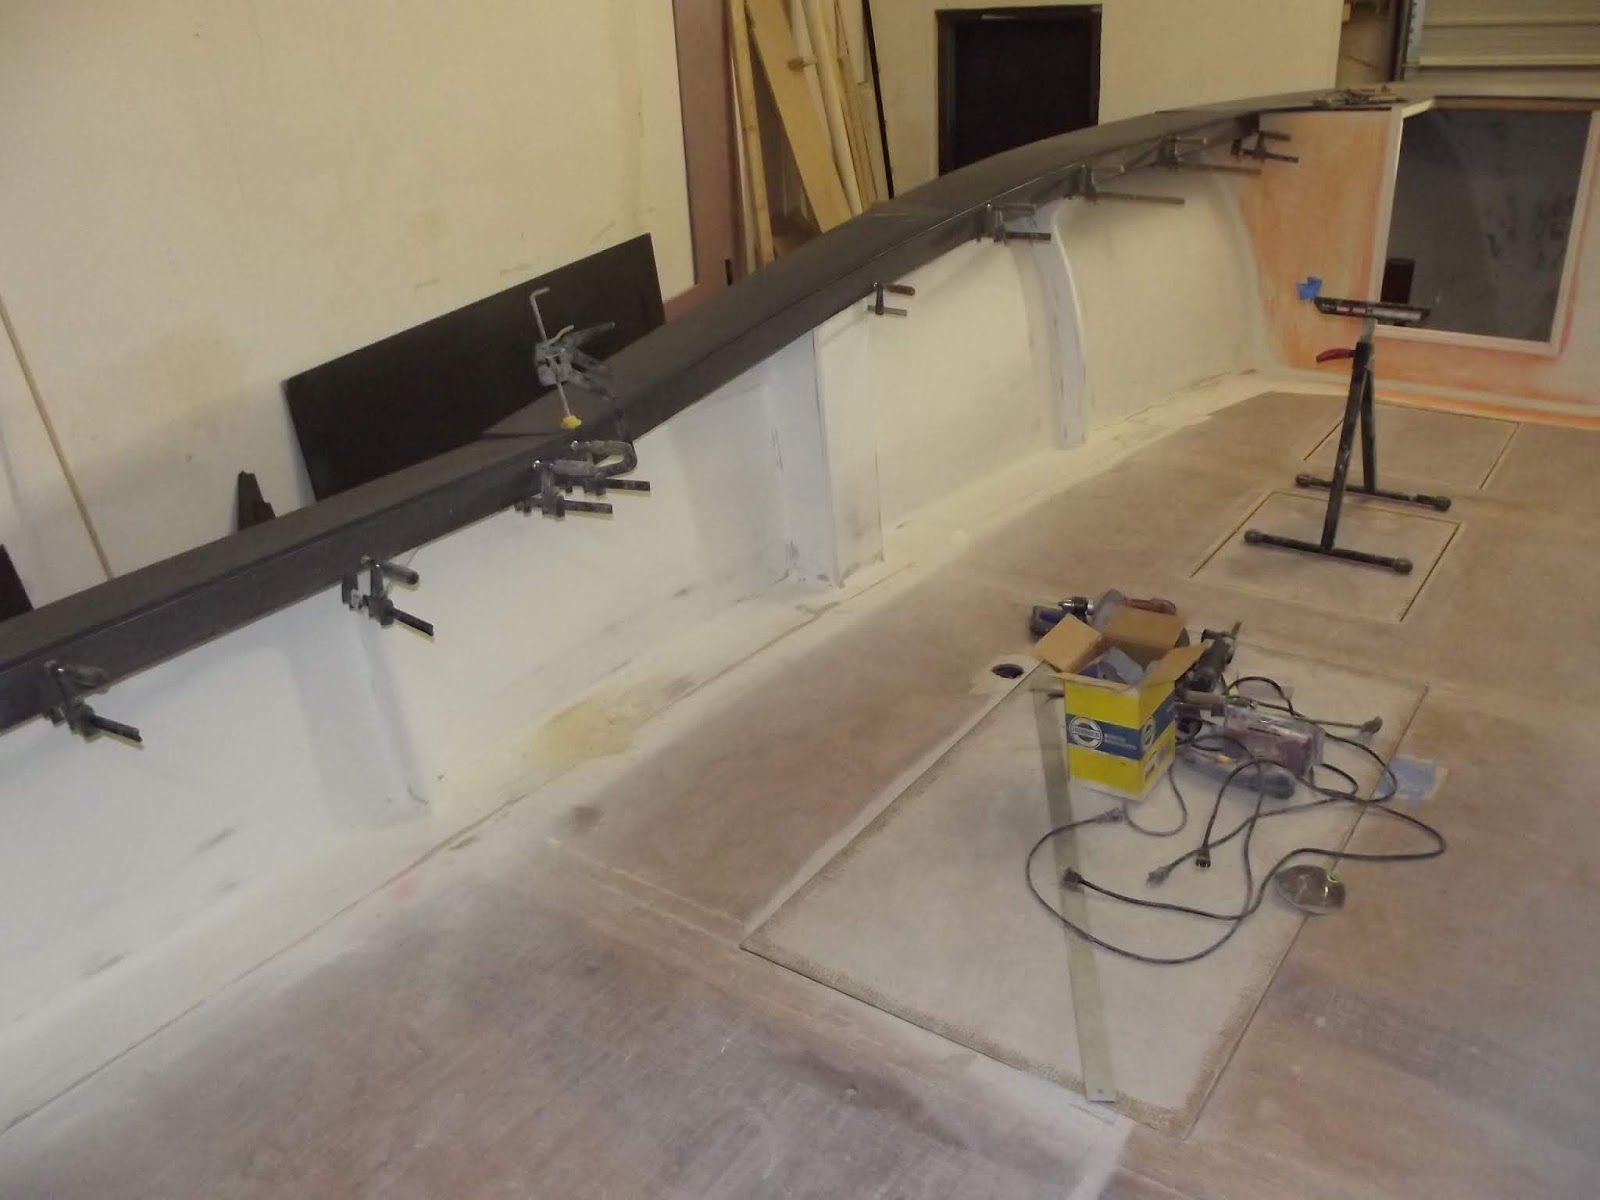
| The fascia is already glued on. The side decks have been glued, held in place by clamps along the inner edge and by screws with fender washes along the sheer. |
 |
| Lots of clamps needed for this job. Screws with fender washers do the job on the outer edge where clamps cannot work. Kevin is cleaning up the excess glue on the underside of the deck. |
The foredeck has been cut to shape and is ready to be fitted. That will happen after painting of the cuddy cabin has been completed.
This design won't be on our website until close to launch time, so that any decisions taken during the build will be shown on the drawings that we sell. See our other designs on our
main website or our
mobile website.


This detailed post on the 26ft Sportfisherman, focusing on the fish box and side decks, is a captivating read for boating enthusiasts. The design considerations and practical features demonstrate a deep understanding of the needs of anglers. Dudley Dix provides valuable insights into optimizing space and functionality. A must-read for anyone passionate about sportfishing and boat design!
ReplyDelete