Showing posts with label build it yourself powerboat. Show all posts

Sunday, January 27, 2019

26ft Sportfisherman Fish Box & Side Decks

The fish box of Kevin Agee's 26ft sportfisherman is progressing nicely. When planning this part of the boat the conflicting needs for efficient cockpit drainage, storage lockers, access to seacocks and maximising fish box capacity must be worked out and different solutions might be settled on for different boats. For Kevin's boat we have constructed the insulated fish box across most of the transom width, with a locker at each and and a toe-kick recess at the bottom.

The choices for the cockpit drains were going through the sides of the hull forward of the fish box, fitting drain pipes through to the transom or building ducts for the same purpose. We chose to build ducts as a good way to have large capacity drains while also being able to shape them to go around the access covers over the compartments below. This also allowed us to hide the drains under the wings of the outboard engine bracket on the outside and in the toe-kick recess of the lockers on the inside.
Basic fish box structure roughed in. The gaps at the ends of the toe-kick recess are for the drains.
Plywood components forming the ducts to feed water through to the transom drains.
Completed drain duct. The large hole will be covered by an access cover. The ball valve is for the fish box drain and will connect to a spigot into the duct.
Fish box constructed with plywood liner and foam slab insulation. Epoxy filleted at all corners.
The side decks were next on the build list. This started with fitting the light framing that defines the shapes of curves of the upper and lower edges of the side deck fascias. With these glued in and held to their required shapes by the side frames and gussets, the fascias were cut and fitted first, followed by the side decks. I was designing for this work to be done in marine plywood but this can be replaced by Coosa board. Kevin has chosen to do the decks in Coosa, fibreglassed both sides.
Cleats at top and bottom of the fascia define the shapes of fascia and deck. We added two gussets between frames, to shape the sheer break and to hold the cleats parallel to the sheer curve where it turns in aft due to the tumblehome.
At the sheer break the relatively straight aft cleats (glued in first) must be held firmly in their correct positions, so that the heavily curved forward cleats can be trimmed to come in at the correct angle and position, then glued. This is done with the gusset seen in the photo, which stays in place as permanent structure.
Coosa fascia and side deck dry-fitted to test for it. The fascias were cut as straight strips then flexed into place. The side decks were cut to the required shapes. All panels were then glassed on the back face before fitting.
The fascia is already glued on. The side decks have been glued, held in place by clamps along the inner edge and by screws with fender washes along the sheer.
Lots of clamps needed for this job. Screws with fender washers do the job on the outer edge where clamps cannot work. Kevin is cleaning up the excess glue on the underside of the deck. 
The foredeck has been cut to shape and is ready to be fitted. That will happen after painting of the cuddy cabin has been completed.

This design won't be on our website until close to launch time, so that any decisions taken during the build will be shown on the drawings that we sell. See our other designs on our main website or our mobile website.

Wednesday, August 29, 2018

Installing Services in the 26ft Sportfisherman

When building a boat there is a lot of effort that goes into parts of the boat that will be hidden and hopefully never seen again. Nevertheless, that hidden work has to be carefully planned and executed if there are not to be problems further into the project or, worse still, after the boat is launched.

Kevin Agee is in that stage of his 26ft Sportfisherman build. It would feel good to lay the deck and see what would seem to be another big step forward. But that would be jumping the gun. Before that can be done all of the hardware under the deck must be installed. That includes fuel, water and waste tanks, piping, valves, skin fittings, pumps, bilge blowers and the solvent-glued PVC ducting to carry hoses, electrics and engine controls.
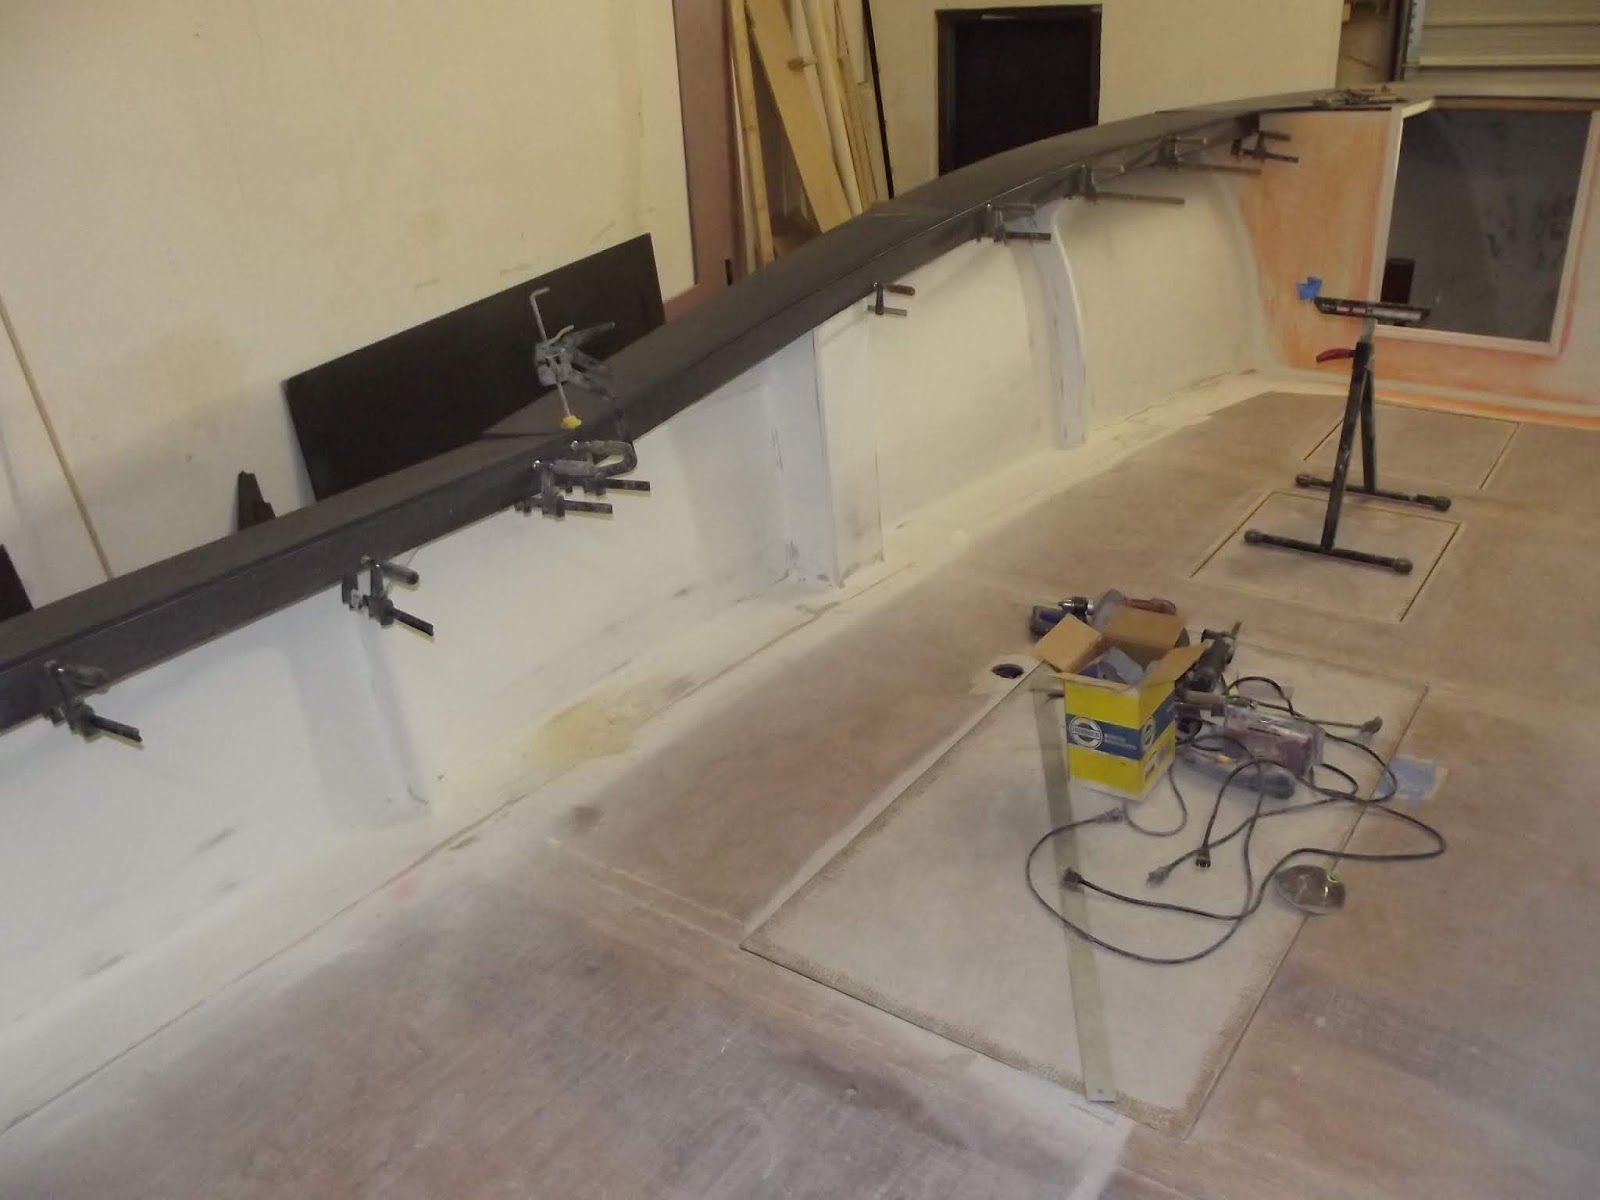
Looking forward from the transom. PVC ducting to carry hoses, electrical cables and engine controls, installed through bulkheads and girders. The platform at the front end of the compartment in the foreground is for the batteries. The fuel tank will go into the next compartment forward and the water and waste tanks will be forward of that. The ducts that turn up against the hull sides will carry fuel filler, vent pipes and wash-down piping.
Looking aft from the front of the cockpit. The water and waste tanks are in the foreground. The next compartment is for the fuel tank. These tank compartments have plywood bottom panels, with voids beneath that form a tunnel for bilge water to run aft to the bilge pumps. All of these compartments and the tunnel under the tanks have been thoroughly protected from moisture by glass/epoxy laminates.
Preparations inside the outboard engine bracket for cables, engine controls and fuel lines. These compartments will be accessible through flush plastic access covers through the aft platform.
Well-planned access to these under-deck areas is important for later removal of tanks if needed and for reaching seacocks, pumps etc. The choices are to fit commercial hatches or make them from scratch. Whichever choice is made, the hatches need to be flush, or nearly so, or people will be tripping over them and at risk of injury.
One of the hatch gutter frames for a flush hatch. The rebate around the outer edge will receive the edge of the plywood deck, with the frame finishing flush. The gutters will drain into pipes that discharge overboard.
Bottom view of the gutter frame. The splayed face was cut on a table saw to remove unneeded timber to reduce weight. The dowels across the corners pass through the glued joints to introduce cross-grain for strength and long-term durability. The dowels will be trimmed off flush.
Another view of a finished gutter frame
This design is not on our website yet. To see our other designs, go to our main website or our mobile website.

Thursday, June 11, 2015

Wooden Boat Show

Summer heat is setting in and minds are turning to activities that can keep us cool. Time for us to get out on the water and go boating.

Time also for the Wooden Boat Show, which takes us north on a 500 mile road trip from the rapidly over-heating Virginia to the somewhat cooler climes of New England, more particularly the very beautiful Mystic Seaport. I must admit that in June/July I think that part of Connecticut must be a great place to live. Then I think about how much I dislike the (much milder) cold of a Virginia winter and know that I was built for much more tropical places.

The Wooden Boat Show  will be 26-28 June and we will once again be exhibiting our bright yellow Paper Jet prototype. Close by, in the "I Built It Myself" section, will be the prototype of our new 16ft garvey design. This is "Inlet Runner", exhibited by amateur builder Kevin Agee of Hampton, Virginia. He is working long hours into the night to get it finished in time for the show. It will be showing off its very fresh paint job. Never having built a boat of any size or type before, he has surprised himself with the high standard of work that he has achieved.
Kevin Agee's "Inlet Runner" 16ft garvey nearing completion.
We are also using this opportunity to do the official launch of my new book "South Atlantic Capsize - Lessons Taught by a Big Ocean Wave". We will have copies on hand at a special show price and you may be able to pin me down long enough to sign your copy. Special show price only to those who visit us at the show.

To see more about our boat designs, please visit our main website or our new mobile website.

Saturday, May 9, 2015

Kevin's Garvey Progress

I wrote in January about the 16ft plywood garvey being built by Kevin Agee. Kevin is progressing nicely and benefitting from the very welcome spring that has finally arrived and eased out the rather brutal winter. Now it is easier to do woodwork and epoxy cures much faster, so work progresses more quickly. Epoxy coatings in the sealed spaces are being completed and this weekend the deck will be glued on.
Hull skin completed, interior details being fitted.
Supports for battery box and fuel tank.
Deck stringers going in, test fitting of fuel tank.
Bottom runners serve as stringers and bottom protection.
Dry-fitting deck, ahead of final installation this weekend.
Kevin Agee is doing a nice job of his project and will display it in the "I Built It Myself" section of the Wooden Boat Show at Mystic Seaport at the end of June. If you want to see this boat, that will be the place to do it.

Plans are not yet ready for selling but should be in a month or two. We will offer it as plans and instructions, with options of full-size patterns or a pre-cut plywood kit.

To see our designs for your next amateur project, please visit our website at http://dixdesign.com .