Showing posts with label wooden powerboat plans. Show all posts

Tuesday, October 29, 2019

27ft Sportfisherman "Dedication"

Launch day gets closer for the amateur project 27ft sportfisherman of Kevin Agee. Aside from the physical progress on the boat, she has also been given a name. She will be named "Dedication" for the commitment that Kevin put into building a high quality boat. That will also be the design name, when I can get around to completing the drawings.

Since my last post we have installed the fuel tank. Kevin has painted the cockpit and deck and connected the fuel filler hose. On Sunday we fitted the cockpit access covers over the fuel tank connections and installed the centre console and leaning post.
Deck & cockpit painted, fuel tank installed. The grey areas are a sprayed non-skid and the white areas are gloss. Rod holders have been installed in the side decks. The two immediately aft of the sheer break each side will hold the bait board supplied by Australian company Stainless Boatworks.
Flush panel over fuel tank, with access covers over connections.
View of aft end of cockpit. Insulated fish box is in the centre, with a locker each side for access to bilge pumps and fish box drain controls. The cockpit drains are at the ends, draining under the lockers then through the transom below the stern platform.
Console and leaning post installed. Each has access to the hinged cover inside, over the tank plumbing.
The leaning post has a large bait tank and aft-facing seat. The bait tank has semi-circular ends to allow the water to swirl rather than splash when surging from wave action.
All painted except for varnishing the toerails.
Work has been ongoing on the tower. Assembly of the tower on the boat will start next week. When the tower, hardtop and crow's nest are complete she will go to the engine shop to have her engine mounted on the bracket.

This design is not yet on our website. To see our design range go to our main website or our mobile website.

Sunday, January 27, 2019

26ft Sportfisherman Fish Box & Side Decks

The fish box of Kevin Agee's 26ft sportfisherman is progressing nicely. When planning this part of the boat the conflicting needs for efficient cockpit drainage, storage lockers, access to seacocks and maximising fish box capacity must be worked out and different solutions might be settled on for different boats. For Kevin's boat we have constructed the insulated fish box across most of the transom width, with a locker at each and and a toe-kick recess at the bottom.

The choices for the cockpit drains were going through the sides of the hull forward of the fish box, fitting drain pipes through to the transom or building ducts for the same purpose. We chose to build ducts as a good way to have large capacity drains while also being able to shape them to go around the access covers over the compartments below. This also allowed us to hide the drains under the wings of the outboard engine bracket on the outside and in the toe-kick recess of the lockers on the inside.
Basic fish box structure roughed in. The gaps at the ends of the toe-kick recess are for the drains.
Plywood components forming the ducts to feed water through to the transom drains.
Completed drain duct. The large hole will be covered by an access cover. The ball valve is for the fish box drain and will connect to a spigot into the duct.
Fish box constructed with plywood liner and foam slab insulation. Epoxy filleted at all corners.
The side decks were next on the build list. This started with fitting the light framing that defines the shapes of curves of the upper and lower edges of the side deck fascias. With these glued in and held to their required shapes by the side frames and gussets, the fascias were cut and fitted first, followed by the side decks. I was designing for this work to be done in marine plywood but this can be replaced by Coosa board. Kevin has chosen to do the decks in Coosa, fibreglassed both sides.
Cleats at top and bottom of the fascia define the shapes of fascia and deck. We added two gussets between frames, to shape the sheer break and to hold the cleats parallel to the sheer curve where it turns in aft due to the tumblehome.
At the sheer break the relatively straight aft cleats (glued in first) must be held firmly in their correct positions, so that the heavily curved forward cleats can be trimmed to come in at the correct angle and position, then glued. This is done with the gusset seen in the photo, which stays in place as permanent structure.
Coosa fascia and side deck dry-fitted to test for it. The fascias were cut as straight strips then flexed into place. The side decks were cut to the required shapes. All panels were then glassed on the back face before fitting.
The fascia is already glued on. The side decks have been glued, held in place by clamps along the inner edge and by screws with fender washes along the sheer.
Lots of clamps needed for this job. Screws with fender washers do the job on the outer edge where clamps cannot work. Kevin is cleaning up the excess glue on the underside of the deck. 
The foredeck has been cut to shape and is ready to be fitted. That will happen after painting of the cuddy cabin has been completed.

This design won't be on our website until close to launch time, so that any decisions taken during the build will be shown on the drawings that we sell. See our other designs on our main website or our mobile website.

Monday, September 24, 2018

Deck & Sheer of 26ft Sportfisherman

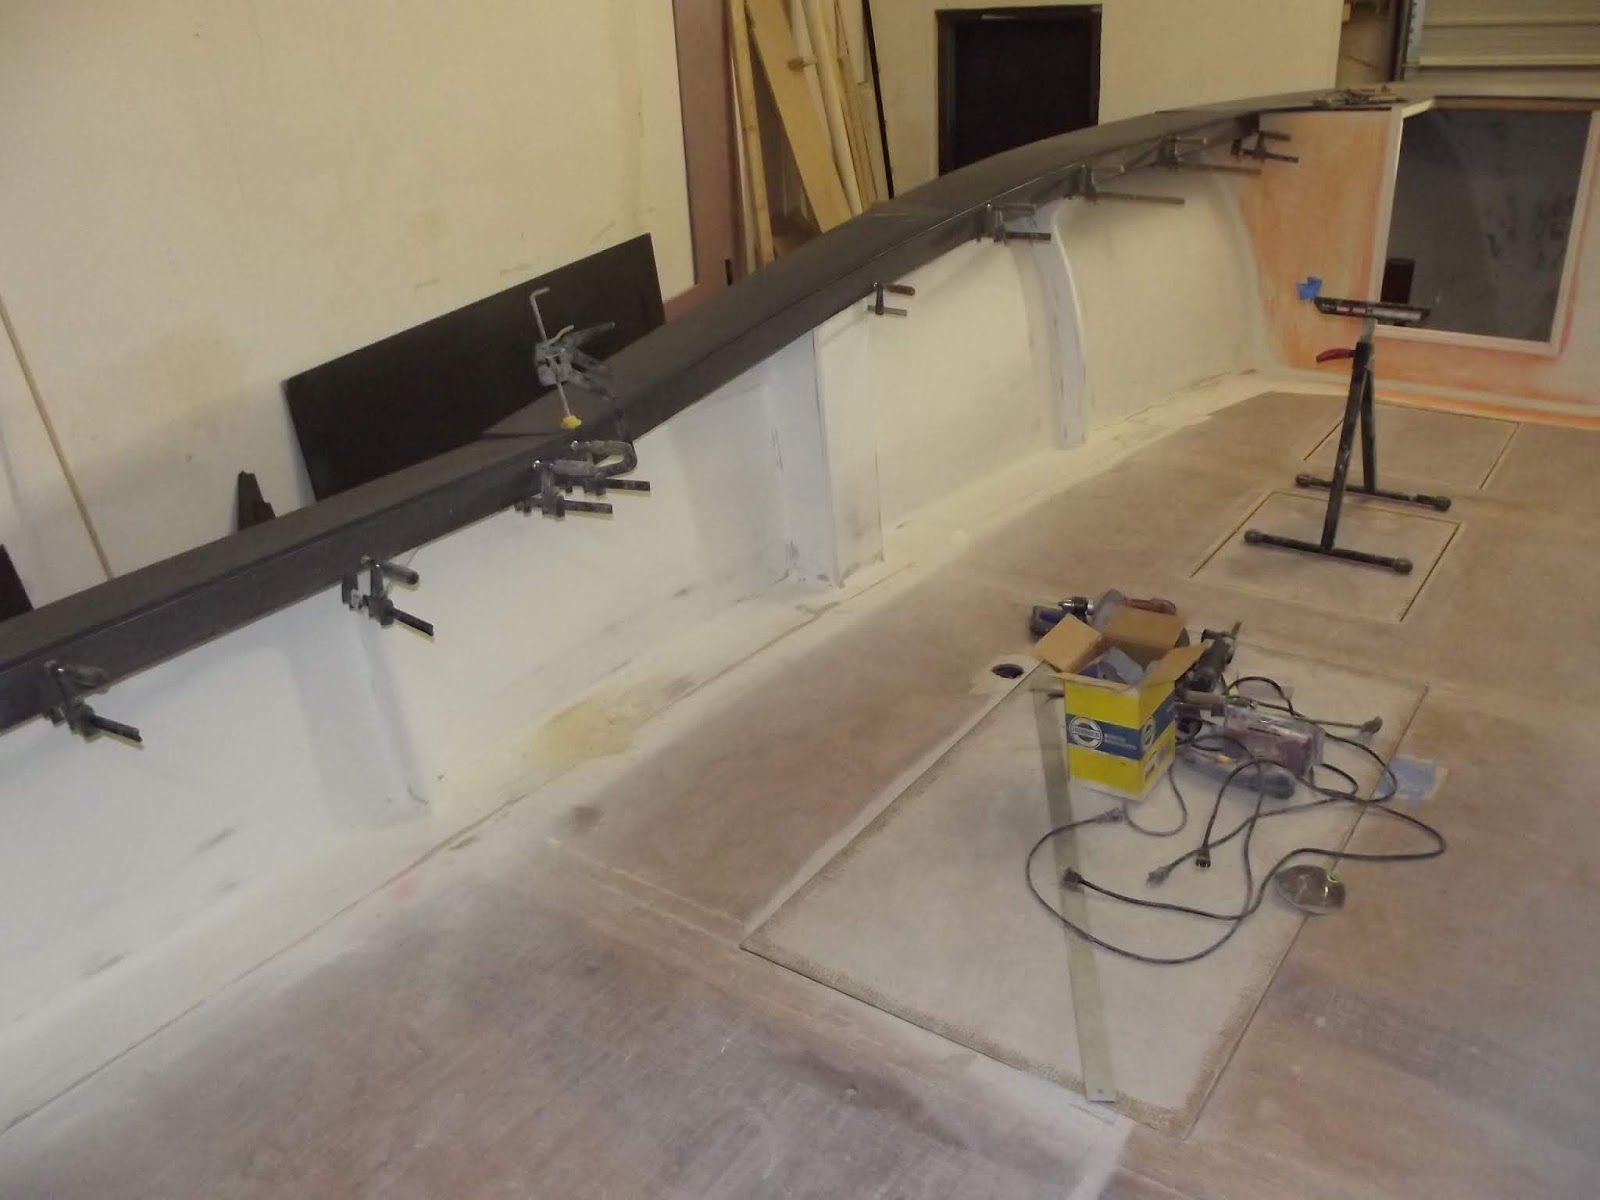
There is still a lot of work going on under the wet deck of Kevin Agee's 26ft Sportfisherman project, before the deck skin can be glued down. The tanks are being prepared, with spigots and access openings installed in the right places, as well as neoprene pads to prevent chafe of the tanks. The seacocks are being installed, as well as pumps for fresh water, holding tank and bilge water. Also a bilge blower to keep the under-deck areas fresh and free of potentially explosive fumes. Openings through bulkheads for hoses and cables are being fitted with PVC 2-piece liners to eliminate chafe. All compartments that will not be sealed are also being painted with multiple coats of white epoxy paint for easy cleaning and to make it easier to see what is going on in there for maintenance or in an emergency. Trying to find a leaking fuel hose in a dark and dingy dungeon at sea is no time to be wishing that you had painted a bilge compartment.
Deck beams and hatch gutter frames have been glued in. Bilge compartments that won't be sealed have been painted white. The black areas in the compartment closest to the bottom of the photo are the bases of battery boxes.
Compartment with battery boxes. Pumps in easily-accessible places. The seacocks are also being installed in this compartment. The cable openings through the girders have PVC liners to prevent chafe of the cables.
So, what was I doing while Kevin has had his head in the bilges? I have been shaping the sheer. This is a fairly skilled way of converting expensive Douglas fir and cedar solid timber into chippings from a power plane, followed by wood shavings from a hand plane. The sheer clamp was laminated from Douglas fir before the cedar skin was glued onto the framing. The sheer clamp ended up rectangular in cross-section. It remains more-or-less rectangular for most of the hull length, where the hull and deck intersect at close to 90 degrees. As we work toward the bow this angle becomes progressively more acute, requiring trimming off the top surface until, close to the bow, the sheer clamp is nearly triangular in shape.

The rectangular sheer clamps as laminated into the bulkheads. They are square to the hull skin, so they twist a large amount in the flared part of hull.
Sheer clamps planed down to finish flush with the underside of the deck. At the sheer break the hull/deck intersection is close to 90 degrees, so the sheer clamp is nearly rectangular. Forward flare increases rapidly and the sheer clamp twists to follow the angle of the hull skin. The resulting taper on the inner face of the sheer clamp can be seen, becoming more triangular.

Sheer clamps before planing. Top of the forward bulkhead shows the line to which the top of the sheer clamp is to be planed.
Sheer clamp planed flush with top of the bulkhead. The score mark in the surface is a saw cut that was made into the sheer clamp as an extension of the bulkhead edge, to serve as a guide to get the planed surface correct.  Now the rectangular sheer clamp is almost triangular and the rest of the timber flew onto the shop floor.
Finished sheer, ready to receive the deck.
This design is not yet on our website. To see our available designs, go to our main website or our mobile website.

Tuesday, May 29, 2018

End of the Sportfisherman Fairing

Kevin has been finding muscles in places that didn't have muscles before. Longboard sanding large surfaces tends to have that effect. But it is a process that must be gone through if the boat is to have a really nice standard of finish. Any shortcuts at this stage of the build will show in the final finish and take even more work to improve later.

I described the general process of filling/sanding/fairing/sanding in my previous sportfisherman blog post. Now, to round off the process, Kevin sprayed on three coats of high build epoxy for the last sanding operation. This layer is much harder than the sprayed fairing layers, so much tougher to sand. Before sanding he sprayed on a guide coat composed of denatured alcohol with food colouring mixed into it. This is sprayed on in a thin film that leaves a very thin coating of colour after the alcohol has evaporated off. Longboarding this surface removes the colour on the high spots and leaves it in the low spots of any texture on the surface. Continuing to sand until the last of the colour has gone ensures that there is no orange peel or other texture left to detract from the gloss finish coats that will follow later.
The blue in this photo is the guide coat of food colouring and denatured alcohol that was sprayed on to assist sanding.
With sanding nearly finished, the hull is showing a good standard of fairness and finish to form a smooth foundation for the high gloss finish coats.
While Kevin was developing his muscles I was stripping out the temporary frames and formwork from inside the hull, items that are no longer needed to support the hull. This is to reduce weight for when the hull is turned over.

The next step was to start building the frames around the hull that will protect it and provide support while the boat is turned 180 degrees. These frames are at permanent frames 3.5 and 7, which spread the hull weight evenly and also are of similar width, allowing two similar frames to be built. The first parts added were the bottom frames, bolted to the frame bases, stiffening them considerably. With those in place the hull was raised with a trolley jack and blocked a few inches clear of the building stocks. Then the stocks were taken apart and much of the timber reused to build the turning frames. Once the stocks were out of the way we jacked the hull again, removed the blocks and lowered the hull to stand on the frames, resting on the floor.
Turning frames built around the hull, with carpet padding between the frames and hull. The diagonal braces needed to stabilise the frames must still be added.
With the temporary frames removed, the structure of the hull is more easily seen.
Work on sanding the hull, applying barrier coat to the bottom and completion of the turning frames is continuing, in preparation for turning the hull this weekend.

This design is not yet on our website, I am still drawing it. To see our other designs, go to our main website or our mobile website.

Monday, April 16, 2018

Glassing the Sportfisherman

Glassing of Kevin Agee's 26ft sportfisherman started yesterday, using WEST epoxy with a slow hardener to give ample time to do the work. We settled on a procedure that would give a surface that will need the least amount of fairing after completion of the glassing. That needed the glass fabric, 1708 biaxial glass with chopped strand mat on one side, to be laid down in a single length to eliminate transverse laps.

The procedure was to set up the roll of glass on a stand in front of the hull, then roll it out onto the bottom of the hull, cutting to size and shape. The 50" roll width was enough to cover one side from alongside the keel runner across to the chine, including the overlap onto the side. We cut two of these, one for each side, then rolled them up, ready for use.
Glass fabric laid out on hull and cut to shape.
The glass layer was to be covered by a layer of peel ply, so the order of tasks was to pre-coat the wood with epoxy in increments of approx 4ft, roll out the glass, wet-out the fabric with epoxy applied with mohair rollers, roll out the bubbles with ribbed rollers, lay peel ply over the top, squeegee smooth, then move on to the next 4ft section and repeat the process. The peel ply we laid in transverse strips so that we wouldn't be working with two rolls one behind the other to complicate the process.

Michelle mixed the epoxy, Kevin worked from the side on a ladder and I worked on top from the other side of centreline. We worked from transom through to the bow. About half-way through we realised that the planned completion of both sides of the bottom was not going to work. How was I going to work on top of the hull with fresh laminate where I had to stand? So the plan changed from doing two bottom panels in the day to doing one bottom panel and the opposite side, to remove any conflicts.
Half bottom glassed and covered with peel ply.
Glass wrapped onto transom. The glass roll on top of the engine bracket is for other bottom panel.
Two of Kevin's friends arrived to help after lunch, so we now had five working together to follow the same procedure. This was a big help because measuring out the glass for the side needed the glass to be held up against the hull, rather than calling on gravity to hold it there as we could with the bottom panel. The two new guys had done this work before, which none of the other three of us had done. They introduced the additional step of laying the glass back against the previous work to roll resin onto the contact surface of the new glass before it is pressed against the resin on the plywood, speeding up the wetting process.
Hull side glassed and covered with peel ply. It wraps across the chine flat and onto the bottom. When the second bottom is glassed there will be a double layer over the chine, a high-abrasion area that needs greater protection.
Side laminate wrapped onto transom. 
Other work that was done prior to starting the glassing was gluing the bottom panels onto the engine bracket, as well as structural epoxy fillets around the perimeter and inside the bracket. Some of this can be seen in the photo above.

The rest of the hull will be glassed over the next week.

This design is still not on our website, so there are no links to the design in this post. To see our range of designs go to our desktop website or our mobile website.

Wednesday, March 28, 2018

Longboarding on a 26ft Sportfisherman

Kevin Agee has been longboarding the past two weeks. This is not the type of longboarding that I do, surfing the waves on the longest of my surfboards. The longboarding that Kevin is doing is with a flexible board about 1m long, with a pair of handles on one side and coarse sandpaper on the other. This involves application of much elbow grease, removing any surface epoxy glue oozings left after initial cleanup when fitting the strip cedar skin, as well as high spots in the timber surfaces.

As part of the process, low spots are filled with lightweight epoxy filler, thereby reducing the amount of material that must be sanded off surrounding areas to smooth out the surface.

Boat with the pox. The grey patches are areas where hollows have been filled and then sanded flush. 
After that comes more sanding and more filling and more sanding and so on, until you are happy with the surface. A side benefit is some weight gain in arm, shoulder and trunk muscles.

The chine is also faired as part of fairing the hull sides. This is done by first trimming off the overlapping side planking at the chine, then planing them flush with the planks of the chine flat. Any unfairness in the chine flat must be faired by sanding/filling, the same as for the side planking. The hull will be glass-sheathed, so the hard corner of the chine must be rounded off to a radius suitable for the glass fabric.

Also forming part of the fairing process is filling in the holes where temporary screw have been removed. This is normally done by injecting or squeezing filled epoxy into the holes, then sanding smooth. Kevin used an alternative method that is quicker and easier. He used wooden golf tees, epoxied into the holes. After the epoxy has cured the tees are cut off flush.

Another job that is going on is fitting the keel runner. The runner is laminated in place on the hull from two 20mm (3/4") thicknesses but it needs a flat surface on the hull centerline onto which it can be bonded. This flat is rough-formed with a power plane then finished with a hand plane. The flat is continued all the way to the tip of the stem. In the forefoot area the runner tapers off and fairs into the hull to become a laminated stem capping. The stem capping must follow the tight curves of the stem profile, so it has to be done in much thinner strips than can be used for the keel runner.
The keel runner being glued in place onto the flat that has been planed on hull centerline. The chine flat is also being faired.
The stem capping is being glued up one layer at a time from stock that is 1/3 of the thickness used for the keel runner. This slows the process because the epoxy glue must have initial cure before the temporary screws can be removed and the next layer glued on. Multiple layers will build up the capping until the timber can be shaped into the bow profile that we want. The shaping is most easily done in stages, after every two or three laminations.
First layer of the stem capping has been glued on
He has been trimming the sheer as well. All of these features coming together are now giving the hull more definition, so the final hull shape is starting to show.
Final shape starting to show due to crisper lines to catch the eye.
The drawings for this design are still in progress and the design is not yet on our website. To see our designs, go to our main website or our mobile website.

Monday, March 12, 2018

Sportfisherman 26 - The Whiskey Plank

At my last post, the first layer of the chine flat had been fitted and the side skin was progressing. Since then Kevin has glued on the second layer of the chine flat then planed the outer edge for the intersection with the side skin. The side skin fits outside of the chine timbers, so the outer surface must be planed off flush with the frames. That is easy enough to do for most of the length but in the bow it becomes a bit more complicated.

Forward of Station 1 Kevin was unsure how it should be shaped because the chine flat tapers off, to disappear, with the side skin finishing flush with the bottom skin at the stem. That means that the forward end of the chine flat must be recessed adjacent to the edge of the bottom skin. It needs a tapered rebate that is deepest at the stem, tapering to nothing at the point where the width of the chine flat equals the thickness of the side planking. It was visualizing the details of this area that was troubling Kevin.

We shaped this area with a router and a straight bit of about 10mm diameter. The way to get the correct taper on the rebate was to set up a length of timber the same thickness as the side planks and broad enough to guide the base of the router. We clamped this timber to the frames to set the correct curvature and angle for the cut. Running the router along this board and deepening the cut in 2-3mm increments, we gradually worked down to a rebate surface for the side planks to fit into.
Timber strip set up alongside the chine as a guide for the router base, to set both the transverse angle and the fore/aft curve for the rebate.
The completed tapered rebate. 
With that rebate done both sides, the next task was to complete the side skin. The strips that fill in the rebate are neatly trimmed against the edge of the bottom skin. Further aft they can overlap slightly and will be planed flush later.

The last step in completion of the skin was fitting the whiskey plank, done with friends and family in attendance to celebrate this big occasion.
Kevin and Michelle celebrate completion of the hull skin after gluing in the whiskey plank.
Closing in the last of the gaps has made the boat appear considerably bigger than when we could see through it. Now the full shape can be seen and it is looking good. The skin will be planed flush along the chine this week and the sheer will be trimmed later, after turning the hull upright.
Hull skin completed 
The hull sides are now being rough-sanded prior to fairing. Next steps will be gluing on the keel runner, bow capping and planing strakes.

Sunday, March 4, 2018

Sportfisherman 26 Strip Cedar Skin

The strip cedar topside skin of the new 26ft sportfisherman is progressing. The tactic of starting at the level of the aft sheer and running that first strip along the path of least stress seems to have worked out. The strips above and below the first one have been relatively easy to fit, each epoxied and nailed to the previous strip with plastic nails fired in with a pneumatic nailer. A few temporary screws with fender washers were used to hold them at bulkheads and ends until the epoxy had cured.

Fitting the strips is a two-person job, in the interests of getting each strip neatly into position with the glue in the joint where it is needed rather than creating a mess with it where glue is not wanted. Kevin's help came from his dad for a few days and from wife Michelle whenever needed.

After working upward to where further work had to wait for construction of the chine flat, they  continued down to skin the flare, from the bow through to the break in the sheer.
Port side of the flare skinned
My job was to prepare the outer edge of the plywood bottom panels to match up to the chine flat. For most of the length this is a simple matter of shaping the edge to a vertical surface for the rectangular chine strip to butt up against. In the bow this detail has to change because of the much steeper slope of the bottom panel. The vertical edge doesn't work, so a rebate must be formed for the chine strip to fit into, with the bottom skin overlapping over the top of it.

I chose to cut the rebate into the edge of the plywood with hand tools. I could have formed it with a router and edge guide, then planed the edges of the chine strip to fit but I wanted the rebate to have horizontal and vertical faces to match the square edges of the chine strip. Each side took a few hours with chisels, mallet, Shinto saw rasp and a bit of help from a rip saw to cut the top edge once the basics of the rebate had been started with the chisels.
Rebate to receive the chine strip, from bow to Station 1. The bulkhead in the photo is at Station 0.
The vertical edge of the plywood bottom, changing to a rebate in the bow.
The first chine strip dry-fitted to check the fit.
Now the hull flare has been skinned both sides, and the first strip of the chine flat glued in both sides. The chine gives more definition to the hull and it is starting to look really good.
First chine strip in place both sides, giving more definition to the bottom shape.
The cleat that will form the landing for the wet deck was fitted next. It fits into pre-cut slots in the edges of the bulkheads and the hull skin will be fitted over the outside.

The strip between the chine and the top of the cedar strips is the landing for the wet deck, slotted into the bulkheads.
The flare all skinned. The sheer won't be trimmed until the hull has been turned upright.
The second strip of the chine flat must be fitted and trimmed, then the skin will be completed by my next post. Watch for it after next weekend.

This design is not yet complete, so is not on our pricelist or website. See previous posts on this blog about the 26ft Sportfisherman for more info. See our full range of designs on our main website or our mobile website.

Saturday, February 24, 2018

Sportfisherman 26 - Let the Skin Begin

Since my last post on Kevin Agee's project the 2nd and 3rd layers of the sheer clamps have been laminated onto the first one, to take it up to its full size. These layers were easier to do because the first layer was already in place, defining the twist and giving a convenient surface for clamping. There was no need for a Spanish windlass to pull them in.
Second layer of sheer clamp glued and clamped.
The 2nd layer of the bottom skin has also been glued on. It is secured and pulled in tight with temporary screws and fender washers, working outward from the centre of each sheet toward the edges, forcing air and excess glue out at the edges. A boat like this will sometimes take some hard hits on the bottom when running into rough conditions, so bad lamination in the bottom must be avoided. The screws will be removed and the holes filled with epoxy, inserted with a syringe.
2nd Layer of the bottom glued and fastened with temporary screws and fender washers.
Time was approaching for the side skin to be started. This is being done in bead and cove cedar that was bought in 4" plank widths, then cut down to the desired widths on a table saw. After scarphing to the lengths needed to cover the hull in single lengths, they were run through the router on a router table to form the cove and bead. This was done with a crown molding #3 router bit, using the convex part of it for the cove and the concave part of it for the bead. The two fit together nicely for the bead and cove joint.
Crown molding #3 router bit sourced from Lee Valley.
Fit of the bead and cove strips cut with the router bit shown above.
With a large stock of newly-machined strips scarphed into long lengths and waiting on top of the hull, the pressure was on me to finish shaping the bevels on the stem to to the correct angles to receive the ends of the strips. This is done by holding (clamping if there aren't helping hands available) a strip against the sides of the bulkheads and frames, with the forward end in correct position to run fair into the stem and with the tip just short of the stem. Then a saw cut is made into the stem with the saw running against the upper face of the strip until the teeth are flush and parallel with the inner edge of the strip. This is repeated in a series of positions until representative cuts have been made the full length of the stem where it will be crossed by strips.
The stem is still rectangular in section but has saw cuts to show the bevel angle needed by the skin.
Next, the bulk of the timber is taken out with a chisel to give the rough surface , finished off to the final surface with a plane and/or a Shinto saw rasp.
Using a chisel to remove the bulk of the excess wood. This side of the stem proved tough to break out due to the grain direction, the other side came out much more cleanly. This side needed the Shinto saw rasp to finish it, whereas the other side came in nicely with a plane.
The completed stem bevels, ready for the bead and cove strips.
A decision has to be made by each boat builder where to place that first strip. Some like to start at the chine, then work toward the sheer. Others prefer to start at the sheer and work toward the chine. Still others will start somewhere between the two and work in both directions. This third option was our choice, mostly because the boat has a broken sheer that gives a convenient start line.

We started by clamping the strip with the lower edge flush with the lower edge of the straight aft sheer clamp. Forward of that aft sheer clamp, we slid the forward part of the strip up and down against the framing until we found the line that placed the least stress on the strip. In that position there is minimal force needed to pull the strip against the framing, so fitting is easy and the same should also be true for the rest of the skin.
The first strip glued flush along the lower edge of the aft sheer clamp and the forward part aligned for least stress in the timber.
Starting to look good, with six strips fitted. The strips are run past the ends of the hull, then trimmed back after the epoxy has set.
The strips are nailed to each other with plastic brads that are shot in with a pneumatic gun. Temporary screws and fender washers are holding them to the framing. Due to the low-stress alignment chosen for the strips, hand pressure was all that was needed to hold each strip against the previous one for fastening, no clamps were needed.
With much of the hull skinned both sides, time to stop. The chine flat must be built first from Douglas fir, then the side strips will be finished against the chine.
Scarph joints in the strips to make hull-length strips. The strips are positioned to spread the scarph joints out so that they are not all in the same place on the boat.
Building the chine step will be next, on the program for tomorrow.

This design is not yet complete, so is not on our pricelist or website. See previous posts on this blog about the 26ft Sportfisherman for more info. See our full range of designs on our main website or our mobile website.