Showing posts with label amateur boat plans. Show all posts

Monday, March 30, 2020

We Are Open For Business


I didn't realise that it is more than two months since my last post. Time flies when you are having fun, or busy. I am working on a 71ft aluminium cruiser, with the detailing taking a lot of time.

Our lives are being disrupted by the COVID-19 virus that is bringing the world to a standstill. Here in Virginia we are not yet in a lock-down situation but that is probably in our future before long. For now we are social distancing, chatting to neighbours at a distance and keeping contact with faraway family by Skype and WhatsApp.

I work from home, with my wife Dehlia as my only co-worker. We are able to work on as before despite the restrictions.

Many people are taking a break from their normal work, some enforced by authorities and others by choice, to ensure isolation from potential infection sources. We all hope that the situation will return to normal within a few weeks but that looks more and more unlikely.

When stuck at home, staying productive helps to fill the days and lift the spirits. A big enough project can involve most or all of the family, racking up quality time and keeping minds off wanting to be elsewhere. Making something worthwhile with our own hands is very satisfying and can provide the balance needed to keep us sane, reducing cabin fever.

If that something worthwhile that you build is a boat then you will have a new family toy when summer comes or when we can get to the water again. Some of my happiest times as a child were those spent sailing or fishing with my dad. As a teenager those prized memories were made on the water, rowing our family dinghies and, especially, sailing my own boat.

If you are already building one of our boats then nothing changes. Our personal backup, included in the price of our plans, continues as usual and we can advise when needed. If you are considering building, we will do all that we can to help you. We have offered study packs and dinghy plans for delivery as PDF files by email as an alternative to traditional paper prints. We will now expand this to include construction plans, under our normal terms of sale.

In the past most customers have been happy with paper plans sent by first class mail, transported by the airlines and delivered by the postal services in the destination country. There have been massive cutbacks in air travel, so most of the aircraft that would have carried the packages to faraway places are grounded. With so few planes, airmail services are under pressure and have slowed considerably, aggravated by slower delivery in the destination country due to restrictions in movement of people. The alternative of courier service speeds up delivery but is costly. Receiving the plans as PDF files may be a viable option for some builders.

PDF files do have drawbacks, related to the size of the drawings that you will be using. Most of them were drawn to A1 size of 491x841mm (23.4x33.1"). These are way too big to print on a standard A4 or letter size printer but you can view them on-screen and zoom in to see details. You may be able to print sections of a drawing or your printer may have a nesting feature to print in sections for taping together into a single sheet. The best option is to take the files to a print shop for printing on a large format inkjet printer.

Here are samples of drawings to show what you will receive for two different types of designs. Click on the links to see them online, which will have limited clarity. Download into your computer and view in a PDF Reader program. Zoom in to appreciate the greater clarity that is available.
Sample PDF file of a CAD drawing, applicable to most of our designs drawn since 1995.
Sample PDF file of a hand-drawn drawing, applicable to most of our designs before 1995.

Some of our designs include full-size patterns, which we normally print on 36" Mylar roll media. Some of them are as long as 16ft, totally impractical to print in small sections with an expectation of accuracy. These must be printed on a wide format printer. You can print on paper instead of Mylar if you store them in a sealed plastic sleeve and use them within a few weeks. Delaying their use risks dimensional change due to variations in humidity.

Whichever delivery method you choose, we can supply any design from our pricelist, except for the Trika 540. This was drawn by a colleague and is only supplied as paper prints, shipped from Germany.

We wish all of our supporters and families continued good health through this worldwide crisis.                                                                                                                  

Friday, January 24, 2020

Memories of a Trans-Atlantic Race

This week I was sent a photo that brought back good memories, 24-year old memories of our first Cape to Rio Race on "Black Cat", in 1996. It was sent to me by Gavin Muller, who was the youngest in our 5-man crew. He took it on the last night of our race, as we were sailing between our Brazilian landfall of Cabo Frio and the finish line off Copacabana Beach, Rio de Janeiro.
From left, Adrian Pearson, Brian Cole, Dudley Dix and Sean Collins. Sadly, two are no longer with us, the others are scattered around the world.
The Cape to Rio Race is 3500 miles of tradewind ocean racing, starting in Cape Town and finishing in Rio de Janeiro. A race like this breeds friendships that last a lifetime. Most of us were good friends before the race and the three weeks in close quarters in the middle of nowhere, in company of seabirds and the occasional fish or whale, cemented those friendships forever. Gavin was the odd-man-out at the start of the race, being much younger than the rest of us, but he too became a friend for life.
Gavin Muller repairing our light spinnaker.
Adrian Pearson (RIP) was my partner in "Black Cat". Brian Cole introduced us while I was building our boat for the race, bringing him in as crew. Later he joined me to co-finance the project.

Brian Cole (RIP) was the oldest in our crew, at 60. He was a director of North Sails Cape Town and a regular on the crew of my previous boat, "Concept Won". He joined us on this race as navigator for his first and only ocean-crossing voyage. His wife, Marion, was co-skipper with Judy Provoyeur of the all-lady crew of the Schumacher 41 "Kelly Girl", our closest handicap competition in the race. On handicap, they had to reach Rio more than 20 minutes ahead of "Black Cat" to beat us.

Sean Collins was a client many years ago for a rig redesign on his cruiser. He became a friend, sailing with me for many, many miles on "Concept Won". We raced together uncountable times in fully-crewed and double-handed races around the buoys and around the coasts of the Cape of Good Hope, quite justly also named "Cape of Storms". We had much experience sailing in mild weather and in those storms.

Gavin Muller, at 21, was not long out of college. His math teacher, an acquaintance and also a boat owner at Royal Cape Yacht Club, had asked me if I had a crew slot available for Gavin, who had previously sailed a Cape to Rio Race with him while still a school boy. Another friend of mine had to withdraw from the crew and Gavin slid into his spot.
Another of Gavin's photos. This one shows me in the bosun's chair working on the headstay foil, damaged by the spinnaker pole. The big cat watches over me.
"Black Cat" is the prototype of my Didi 38 radius chine plywood design. I designed her primarily for this race, starting to formulate the concept while racing to Rio in 1993 as navigator and sailing master on the Shearwater 39 "Ukelele Lady". I built her in my garden in Hout Bay, a suburb of Cape Town. The build took 2 years with help from my wife Dehlia, Sean Collins and another friend, Nigel Watkins, who didn't join us for the race.

Part-way through that race, with the nearest land (the Brazilian island of Trinidade) about 500 miles away, we had a close call with a boat of about 40ft that was sailing unlit on a moonless night. I was in my berth under the cockpit, dozing with my brain on alert as usual. Brian and Adrian were in the cockpit and I heard a discussion start, trying to identify something ahead of us in the dark. We were under spinnaker, averaging about 10 knots, so closing pretty fast. I joined them in the cockpit to see that we were on course to T-bone this wooden boat. Two wooden boats colliding in mid-ocean would not have been pretty. The skipper of the other boat suddenly appeared on deck, shining a flashlight on his mainsail. Within another 15 seconds we would have been past him and would have made much noise to advise him that he had missed out on the action of unidentified ships passing in the night. I suspect that he still holds those images in his head of our big cat spinnaker bearing down on him fast.

We figured from his course and position that he was possibly en-route from Cape Horn to Europe. Next morning on the daily fleet report I told of our near-miss. The story appeared in the Cape Town newspaper next day, although not entirely accurately reported. We were also the subject of the daily cartoon, the original of which now hangs proudly on my wall at home.
The cartoon drawn by Grogan for the Cape Argus newspaper.
We had not seen our competition "Kelly Girl" since the start but they were always close behind in the handicap race. We hadn't seen another boat for many days although the position reports showed that there were always others somewhere over the horizon. Trinidade was a mark of the course and, as we approached the island toward sunset one day, we saw "Kelly Girl" behind us on the horizon. After that we saw each other at least once a day.

A few days after rounding Trinidade we were sailing in 5000m of inky blue water that suddenly turned brown and murkey. We hadn't seen a seabird for a few days and had hooked nothing on our fishing lure, trailed for many days. At the same time the sky was full of birds and our lure hooked a long-fin tuna. Within 5 minutes we had three of them aboard before deciding to keep the lure aboard rather than have nature think us greedy. The truth is that, with one fish for dinner that night and the other two in the freezer, we could not cope with any more. Within an hour we were back into inky blue water and 5000m of water, having completed our crossing of the 60m depth of the Almirante Saldanha Sea Mount. In another million years or so maybe this will be another island in the Atlantic.

Meanwhile our race-within-a-race carried on with us sometimes ahead and other times "Kelly Girl" appearing out of a thunder storm ahead of us. Cabo Frio was our first landfall in mainland Brazil and we rounded that promontory abeam of each other and 100 yards apart. We finished about 3am that night, about an hour ahead of "Kelly Girl", with the 20 minute handicap advantage in hand as well. Another 4 years on, in the 2000 Cape to Rio Race that same boat was skippered by circumnavigator Anthony Steward, who finished about 20 minutes ahead of us. These two boats are very closely matched for ocean racing.
Relaxing in the Bay of Islands after the race.
Since that 2000 Rio Race "Black Cat" has crossed this ocean twice more, to total six Atlantic crossings. She has also raced the 1700 mile Governor's Cup Race from Cape Town to St Helena Island twice, including line- and handicap-honours in the 2014/15 race.

It is now 24 years that "Black Cat" has been sailing. She has nearly 100 sisters on the water or in build. She has also spawned another 16 performance designs in sizes from 15 to 55ft for a wide range of concepts. These range from monohull dinghies to trailer-sailers and large catamarans, even fast little gaffers. More than 500 boats are on the water or being built to this range of designs. Most are amateur projects, with builders producing impressive quality.
Didi 29 Retro, a gaffer with a great turn of speed.
DH550, a very comfortable and eye-catching cruising cat.
Both of the boats above, as different as they may appear, are derivatives of the Didi 38 design. To see our other plywood designs go to https://dixdesign.com/plywood.htm. Or to see our full range of designs of all types and materials, go to our main website or our mobile website.

Thursday, July 11, 2019

Sailing the Argie 15

I designed the Argie 15 in 1988 for the Argus Newspaper Group in South Africa. They named it after the street corner sellers of their newspapers, the Argie Boys, as a dedication to them. In the more than 30 years since many hundreds of these boats have been built and they are to be found in 60 countries.

I was the first person to sail an Argie 15, the prototype that was built by journalist David Biggs. He produced the weekly DIY supplement for the newspaper and commissioned the design as a DIY project for his readers.
That is a young me at the helm, journalist David Biggs as crew, on the maiden sail of the Argie 15 prototype.
We sailed among the moored boats of False Bay Yacht Club, in about 8-10 knots of breeze, with the boat behaving beautifully. Many boats were built from the articles in newspapers and magazines, as well as plans bought from us, generating a strong following.

I didn't get to sail an Argie 15 again for nearly 30 years, when we launched our own boat three years ago. In all that time I only heard good reports about the handling characteristics of boats to this design. Then, a few months ago, a new builder asked me about the comments that he had read of these boats having lee helm and how to remedy it. I had not seen these comments and told him that I would do some testing with my boat when on a planned sailing trip to North Carolina in June.

That sailing trip was a few weeks ago. I went out by myself in light and fluky conditions that gradually built to about 15 knots and gusty afternoon sea-breeze. This gave me opportunity to test in a range of conditions.

I like to sail from well forward in my boats in light conditions, so I fitted my long tiller extension, a 6ft length of bamboo connected to the tiller by a short length of flexible hose on a pivot bolt. This would enable me to sail from anywhere in the cockpit, from far aft through to sitting on the centre thwart. I had seen in photos that some owners helm from aft, alongside the tiller, so I needed to test this position although I knew it would create problems.

This proved to be the case, with fore/aft trim having a big effect on helm balance. With weight aft, she trims bow-up and the bow gets blown downwind because the centre of lateral area moves aft. The hull should float close to the attitude shown on the sail plan to get the balance between sails and underbody correct.  If sailing alone, sit well forward, alongside the daggerboard. With other people aboard and sitting toward the front of the cockpit the helmsman can move aft, as seen in the photo of the prototype, keeping the boat fairly level. Just because you can sit next to the tiller is not a good reason to do so, trimming the boat level is what is needed.

Trimming the boat so that it heeled to leeward or windward also had a large effect on the helm balance. Sailing in steady light breeze while sitting on the windward side gave me lee helm but sitting on the leeward side gave me weather helm. In light but gusty conditions, sitting on the windward side, I had lee helm in the lulls and weather helm in the gusts. I then sailed downwind, standing in the middle of the cockpit, with one foot on each side of the cockpit. This allowed me to push down on either foot to change the heel angle. With the rudder on centreline I was able to steer the boat to either side as much as I wanted, with my feet. Pushing down on the windward side heeled it to windward and gave lee helm, pushing the bow toward the leeward side. Pushing down on the leeward side did the opposite.

This results from changes in the shape of the immersed portion of the hull with changes of heel angle. When heeled over to leeward, which is the correct attitude when sailing, the leeward side of the hull becomes more curved and the windward side becomes less curved. The neat symmetrical hull shape when upright changes to somewhat of a banana shape when heeled and that banana shape turns the boat toward the high side.

At the same time the centre of the sail area, through which the wind drives the boat forward, moves off to leeward of the hull. The drag from the water, holding the boat back, stays at the hull. This results in a lever with the sails pushing forward at the one end and the hull holding back at the other end. This causes the boat turn to windward, i.e.to have weather helm.

Those two effects from heel that create the desired weather helm will also work in reverse. Heel your boat to windward instead of to leeward and those effects will move to the other side of the boat and give you lee helm.

The effect of fore/aft trim and heel on helm balance is common to most boats of all sizes that have a fin keel, centreboard or daggerboard. I used these affects on my Didi 38 "Black Cat" to maximize boat speed in light to moderate conditions. In light breeze I had most of my crew to leeward on the foredeck. As the wind increased I gradually moved crew aft and to windward, one person at a time, thereby adjusting the amount of weather helm by changing the fore/aft trim and heel angle. It works exactly the same in a dinghy like the Argie 15.

The take-away lesson from this is that you can adjust the helm to suit yourself, between lee helm, neutral and weather helm, by moving weight around the boat. For the Argie 15 the main points are:-

1) It should not be sailed bow-up but it does not mind sailing bow-down. In light conditions I would sail it bow-down but would trim it level fore/aft for most other conditions. In strong conditions downwind I would get weight further aft, as is normal with most boats.

2) It should not be sailed heeled to windward. Crew don't have to sit on the windward side, they can sit wherever needed to get the nicest feel for the helm in light conditions. In stronger breeze the boat will naturally have weather helm and will need the crew to windward for stability. Again, this is the same for most other boats.

There are also sail adjustments that can affect the helm. More power from the sails increases weather helm. Sails that are full (lots of camber) generate a lot more power than sails that are flat, so they create weather helm. Increase power in the mainsail for light breeze by slacking the foot to increase camber. With a jib that has the forestay inside a sleeve at the luff there should be a line at the bottom of the luff, tying it to the eye of the stay. This line is used to adjust the tension of the luff, which adjusts fullness of the sail. Tighten the line to flatten the sail and loosen it to make the sail more full for more power. If you have Cunningham lines rigged on your boat for jib and mainsail you will use them to adjust luff fullness.

Whether you have an Argie 15 or some other dinghy or small keelboat, you can test these principles on your own boat. When you know the characteristics of your boat you will improve its performance and your racing results.

To see our range of boat designs, go to our main website or our mobile website.

Friday, May 24, 2019

Road Trip to Sail the Didi 29 Retro "Arabella"

It was my 70th birthday 2 weeks ago and I was surprised by my family with a totally unexpected visit by my sister Dorothy and her daughter Robynne from across the Atlantic, come to participate in the festivities and to help make it a very special occasion. Winding down Dorothy's trip, she and I made a brief road trip to North Carolina. We started off down the Outer banks, where I hoped to find some decent surf. The weather stymied that one with strong onshore winds, so we wasted little time feeling sand between our toes, visited the Graveyard of the Atlantic Museum in Hatteras and arrived at the ferry dock to board for Ocracoke to find rows and rows of cars waiting ahead of us.

Innocent us, we did not expect a flood of people to be visiting this tiny barrier island. I expected to arrive at the ferry dock and be boarded 15-30 minutes later, then a short crossing, time to get lunch on the tiny island before boarding our reserved ferry to Cedar Island. Wrong. After sitting in the queue for a long time, the very accommodating NC Ferry staff let us jump the line to catch the next ferry, or we were not going to make out 4pm ferry. That short crossing to Ocracoke is actually about 4 or 5 times the straight-line distance because the ferry has to wind back-and-forth through the channels.
Satellite view of Ocracoke Inlet, Courtesy Google Earth. The Hatteras ferry dock at extreme right, Ocracoke ferry dock at extreme left. The sand banks and channels move around and the ferries have to zig-zag through them. 
So, we had a drive-through tour that really didn't do justice to the very cute little town of Ocracoke, arriving in time to check in for our next ferry, without lunch. The ferry route to Cedar Island was more direct and parallel to the barrier islands, in deep water.The main entertainment was a variety of seabirds soaring behind us and looking for food to be churned up by the propellers or tossed in the air by passengers.

Once on land we saw the results of the coastal areas that were devastated by Hurricanes Florence and Michael last year. Homes destroyed, most that survived now being jacked up 6-8ft to get them above future flooding.Trees still on top of some homes, no longer habitable. And our hotel still undergoing reconstruction, with water service disrupted at times and cold water coming out of the hot taps. But the beds were new and very comfortable, so we got a good night's sleep. In the morning, a short ferry ride and drive to a marina in Oriental.

"Arabella" is very pretty. She was built by professional boatbuilder Bruce Mierke as his personal sailboat, to our Didi 29 Retro design. He customised his build to suit his own needs, so she has a shorter cabin and some different detailing.
"Arabella" in her dock, retractable bowsprit withdrawn
Lifting keel in raised position, hauled up by a tackle system led to the cabintop winch.
Lifting rudder in a casette. Bruce modified this from my original design, to give some steering when the rudder is partially raised. There is an outboard motor well but Bruce has an electric pod drive installed.
With the short cabin, Bruce has kept his halliards at the mast .
The bowsprit retracts and pivots on an inboard traveller on the foredeck, with control lines led aft to the cockpit.


"Arabella" hard on the wind.
Very neat high-peaked gaff rig with nicely-shaped mainsail. All spars are carbon.
So, how did she sail? Wind was very light, around 4-5 knots most of the time. On the flat water that we had, she sailed close to the wind at 3.5-4 knots, with little wake and an easy helm. She cut through the occasional powerboat wakes of the ICW with little fuss or loss of speed. Once cracked off, we pushed out the bowsprit, set the top-down roller-furled asymmetrical off the end and rolled away the jib to allow the spinnaker to breathe.

She powered up and reached at just a touch under the apparent wind speed, topping out at more than 8 knots boat speed in 9 knots of apparent wind. That put her boat speed at well above the true wind speed in which we were sailing. She did this with no fuss and very easy control. The speed gave the feeling that the wind had picked up but with the bag stowed and back on the wind under main and jib, we still had the same light breeze as before. She just gets up and goes. She will reel off the miles if used as a small cruiser.

"Arabella" has the smaller of the two gaff rigs that I drew. This one is suitable for most small crews, for racing or cruising. The other gaff rig is larger and will need a larger and more experienced crew. We also have a Marconi rig with square-top mainsail.

See our full range of designs on our main website or our mobile website.

Wednesday, May 15, 2019

27ft Sportfisherman

I may not have been paying enough attention when I started posting about the 26ft sportfisherman project of Kevin Agee. When we first discussed this proposed design it was to be about 26ft, so that was what I called it. But it grew a bit between first discussions and agreeing the final lines. It is actually a bit over 27ft from stem to transom, so it is now the 27ft sportfisherman project. And that project is now moving into the final finishing stages.

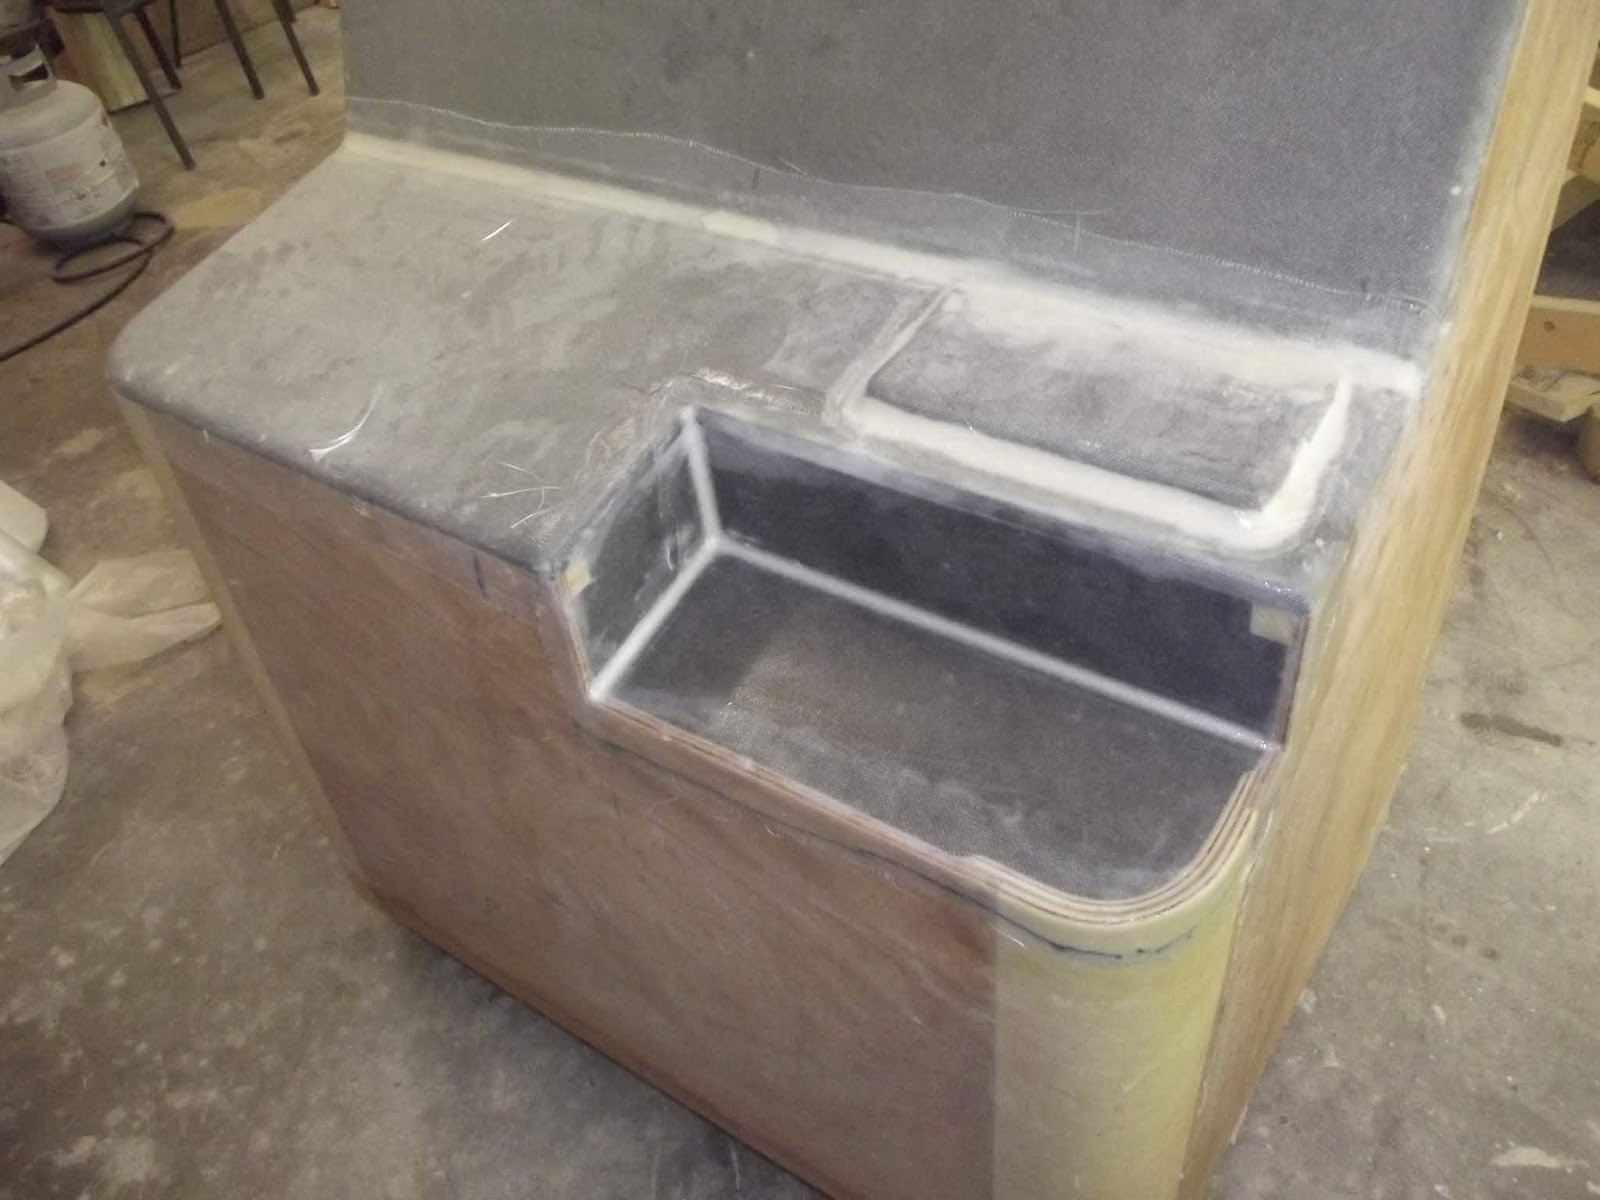
Having glassed the console, next we took a skillsaw to it. That was not to destroy it but to form a concealed switch panel with hinged cover to protect it from the elements.
Console after cutting to form the switch recess. The removed part will be used to form a hinged cover.
This is the infill piece that will fill in the hole in the console, with the switches mounted in the horizontal surface. We made this from 15lb Coosa Board.
The infill piece has been glued into the console. When finished it will hold the electrical switches, including the key-switch for ignition. 
Work has also started on fairing and priming the deck and rubrails to ready them for final painting.

After two coats of high-build epoxy applied by roller, the deck is ready for sprayed fairing compound.
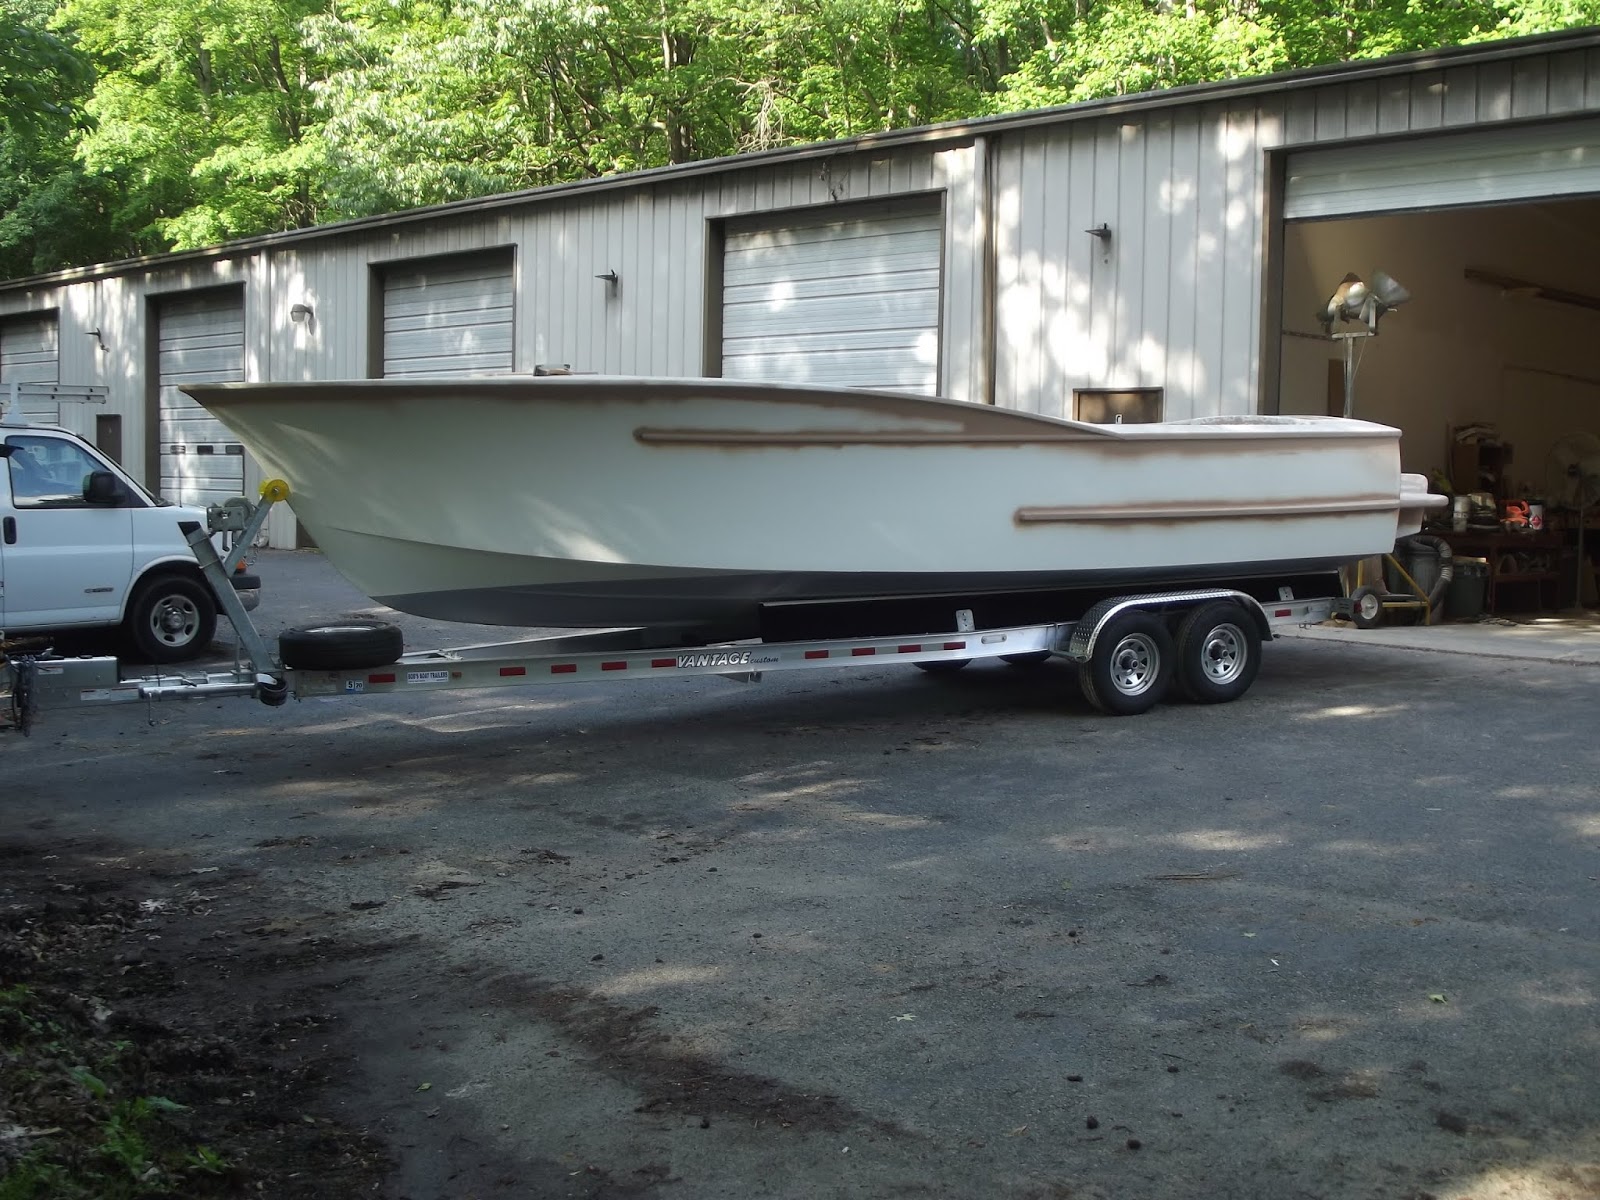
Kevin took delivery of his new double-axle trailer, which had been set up by the supplier to suit the hull bottom. We jacked the boat with trolley jacks, supporting it on boat stands and axle stands, then dismantled the cradle from underneath. Pushing the trailer in under the boat was an interesting process, with trolley jack and axle stand playing leapfrog with trailer frame and axles.
New double axle trailer.
Jacked and supported on boat stands and trolley jack, the cradle was dismantled.
Safely on its trailer, the new boat came out of its shed for the first time.
Showing its lines in daylight.
For the first time we are able to step back and look at the transom and engine bracket.
Launch is still a few weeks away. Plans won't be available until after she is wet and has done some sea-trials. See our full range of designs on our website or mobile website.

Thursday, February 14, 2019

26ft Sportfisherman Stern Detailing

Cockpit work continues on Kevin Agee's 26ft sportfisherman project. The photos tell the story.
Gluing in the cleats around the top of the fish box to support the lid. Many operations in boatbuilding demand hoards of clamps. This is one of them because the cleats must be bent into shape during fitting and held there until the glue cures. The cleats were glassed on exposed surfaces before fitting.
The cleats all done and the Coosa Board deck panel and fascia glued on.
In the corners of the transom, outboard of the fish box, are lockers. In this photo the opening for the door has been cut. The boxing on the left is the duct to take water through the locker to the transom drain. The ball valve is the drain for the fish box and will connect to the hole in the vertical face of the duct, to drain the fish box directly into the drain.
View of the fish box and lockers nearing completion. The doors are dry-fitted and will be installed after painting is completed.. The Coosa Board fascia has been glued on. The cockpit drains can be seen at each end of the toe recess.
The corners are rounded to soften the look of the cockpit and also for comfort when leaning against the decks while working fish. We accomplished this by cutting layers of Coosa Board to equal the height of the fascia. They will be glued in, then glassed over and faired along with the decks and fascias. This is the intersection of the side deck with the fish box.
Same detail at the intersection of the side deck with the foredeck. The foredeck will be fitted after completion of painting the cuddy cabin. The deck has already been glassed and painted, ready to be glued in place on the framing.
Deck stringers seen from below, showing how they are framed into the sheer clamp. These stringers are curly maple and have been precoated with epoxy and will be clear-finished with varnish. The underside of the deck is white-painted.
Also in the cuddy cabin, this box has been glued to the bulkhead to form a step. The opening takes a single drawer tackle box.
Work is about to start on constructing the centre console and leaning post. I am busy on that drawing and the cutting will start next week. A 200 litre live bait well is incorporated into the seat aft of the leaning post.

This design is not on our website yet but you can see our other designs on either our main website or our mobile website.

Thursday, January 24, 2019

Dix 430 Catamaran

A long time ago I drew the basics of a design for a 43ft wood/epoxy catamaran for a professional builder. He didn't have the resources to build the boat, so the design went no further. Ever since it has remained on our website as a teaser, hoping to entice another builder to commission the completion of the design. A few people did ask me to carry on but those requests somehow never coincided with a gap in my design schedule, so it went no further.

I did get to design the bigger Dix 470 and DH550 cats for radius chine plywood construction. A few of the 55 footers have been launched and others are in build to both designs. Both boats are also offered as comprehensive CNC-cut kits of all plywood components, by Exocetus Marine in UK.

Exocetus Marine wanted to expand their kit range down to smaller cats as well, so they commissioned a new 43ft cat with a similar aesthetic to the bigger boats. This has replaced the design that has been languishing on our web pages for so long. Exocetus Marine will have the programming for cutting the Dix 430 completed during the second quarter of this year.
Dix 430 sail plan
As with the bigger sisters, the new design is also radius chine plywood construction, the build method that I developed for my Didi 38 prototype "Black Cat". That boat is now 23 years old and is still racing competitive. That design has been followed by a stream of smaller and larger designs of similar or derivative construction.

In addition to the kit option, the Dix 430 can also be built from plans or from plans plus Mylar bulkhead patterns. They can be ordered through our stock plan pricelist.

The new boat is a good size for family distance cruising and lazing around the islands. Initially available with cruising keels, a daggerboard option may be added later if there is demand for it.
Dix 430 accommodation
Dix 430 cross-section
See more of this and our other designs on our main website or our mobile website.

Friday, January 11, 2019

Didi 27 Retro

It has been a few years since we introduced the Didi 29 Retro, a gaff-rigged cruiser-racer based on our popular Didi 26 trailer-sailer sportboat. Bruce Mierke of North Carolina built his "Arabella" to this design with a modified (shorter) cabintop. Sisters are also being built in Africa, Europe, Asia and Australia.
Didi 29 Retro "Arabella", built by Bruce Mierke.
Inspired by "Arabella", another client commissioned a boat on the same basis but heading in a slightly different direction. The new boat is a classically-styled day-sailer with enough horsepower for exciting sailing.

The hull is based on the Didi 26, with some modifications. It has a plumb bow and aft the lines have been extended for a clean and powerful stern, ending in a radiused vertical transom. Along with that it has bulwarks forward, which taper aft into a normal toerail. The result is a more springy sheer curve.
Clean flush deck and centre cockpit
Bulwarks, bulb fin keel and spade rudder.
Being a dayboat, it has a clean flush deck with centre cockpit and no cabin structure. My client wanted only two settees down below with sitting headroom but I included a double forward berth to add the option of camp-cruising. A Porta-Potti and camp stove can be stowed under the cockpit and a boom tent can extend sleeping space to include the cockpit.
Powerful Marconi rig.
The rig is a powerful fractional Marconi sloop configuration, with square-head mainsail. The asymmetric spinnaker is flown off the end of a retracting and pivoting bowsprit. The deck-stepped mast is supported by double swept spreaders and there are also runners to help with the loads from the asymetrical in strong winds.
Camp-cruiser accommodation
My client wanted a fixed keel and a lifting keel will also be available. The foils are wood, sheathed in uni-directional glass, with a cast lead ballast bulb. The rudder is in a cassette that allows it to be lifted for servicing and for the lifting keel boats to get into shallow water.

We will be offering CNC kits for this boat, including the interior components. Plans are available immediately and kits in the near future.

To see our other designs, go to our main website or our mobile website.

Thursday, November 22, 2018

Cuddy Cabin of Sportfisherman.

The cockpit deck of Kevin Agee's 26ft sportfisherman project is in and the insides of the hull sides have been glassed, soon to be faired ready for painting. The deck of the outboard engine bracket has been completed as well. I detailed the deck extensions of the bracket for wood construction but Kevin chose to do these with a Coosa board core between plywood top and bottom skins. The entire structure was glassed inside and out for longevity.
Outboard engine bracket structure has been completed and glassed. Glassing of the
transom is about to be done. The holes in the deck are for access to steering and
control cables and hoses.
Kevin was also working on hull framing, where I modified them to reduce the projection into the cockpit and increased their thickness to maintain strength. The only frame unchanged was at the boxings for the fuel filler pipes, which has to be large enough to contain pipes, vents and fittings.
Boxing for fuel filler being glued up. The next frame forward has been trimmed
and doublers added both sides, then glassed.
Boxing completed and glassed, ready to be trimmed flush with the sheer.
In the meantime I have been working on the cuddy cabin, fitting out the interior and preparing the deck framing.
Cuddy cabin sole dry-fitted, along with the pedestal for the toilet and the two
small shelf seats.
Kevin glued in the plywood soles and seats during the week before my next visit.
He epoxied bolts into the plywood to serve as studs to fasten down the toilet 
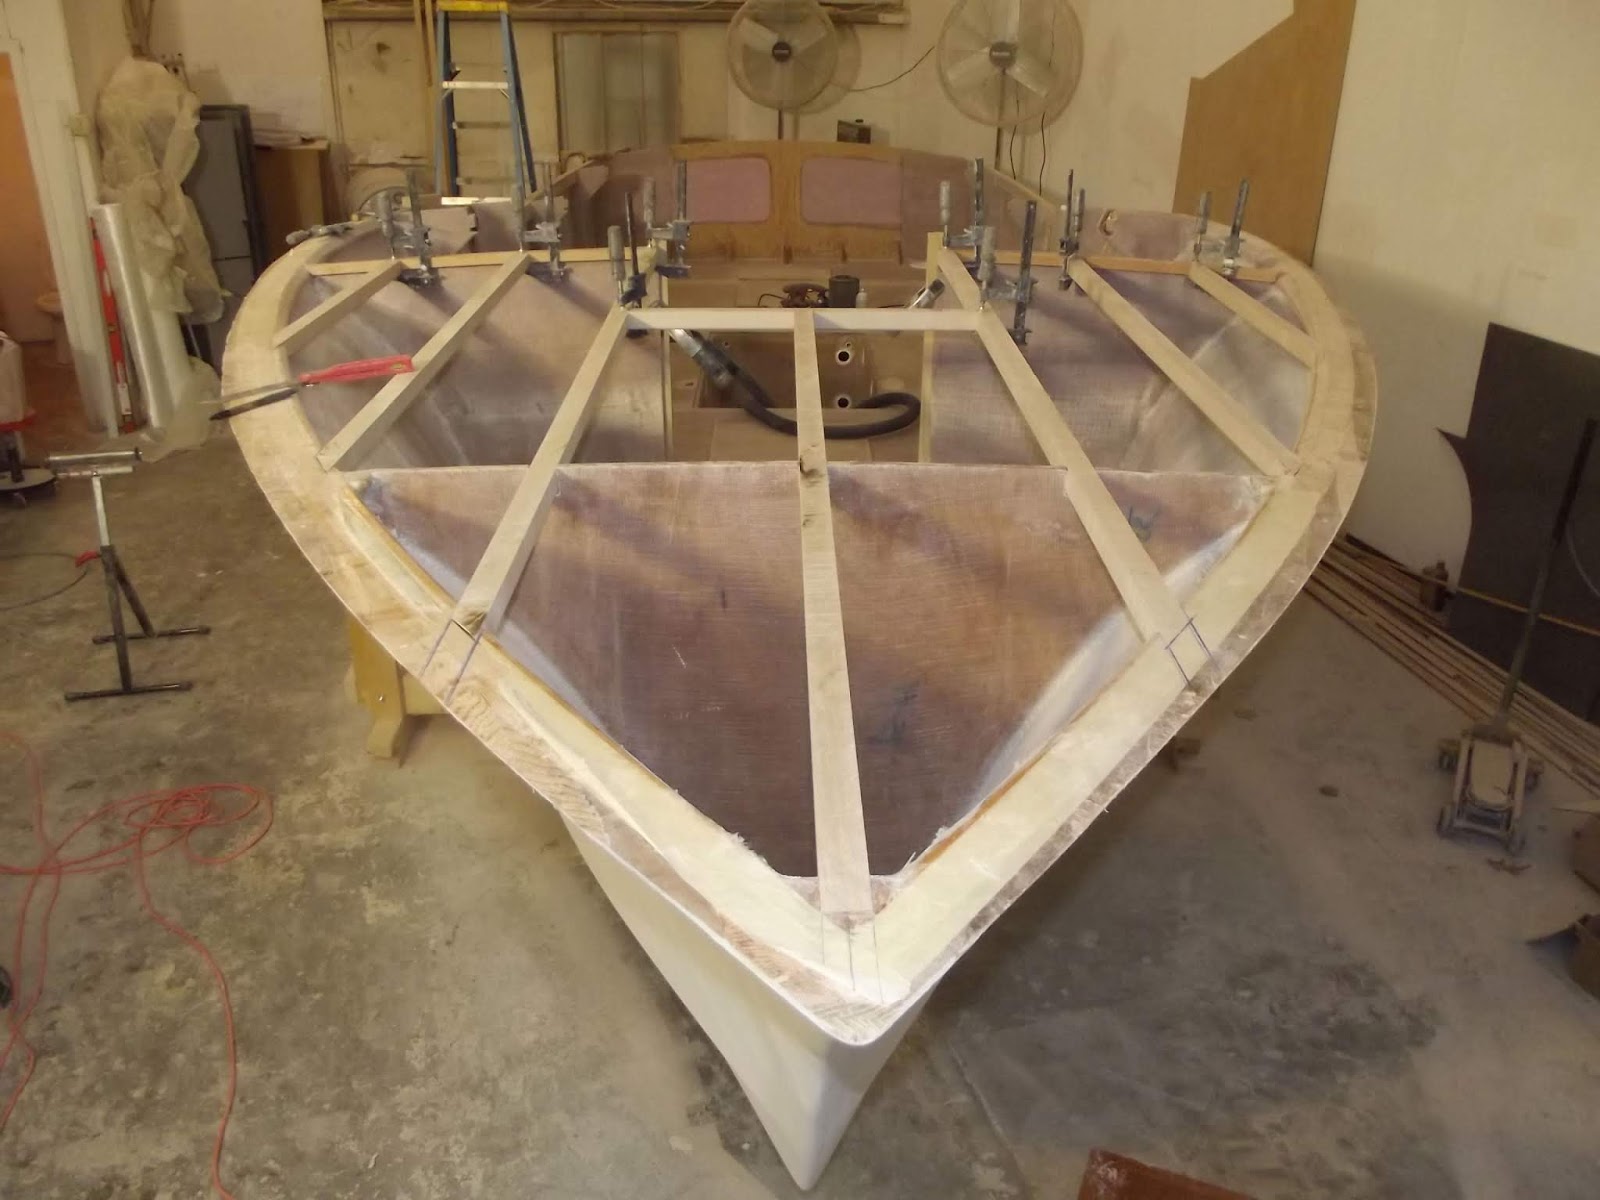
My next task has been framing the foredeck to get it ready for the plywood deck. Kevin has chosen to use curly maple for the deck stringers, which will be clear finished against the white-painted deck. The stringers run through the forward bulkhead and butt up against the aft bulkhead of the cuddy cabin, bonded to the bulkhead and cleat. The forward ends of the stringers are notched into the sheer clamp, which involves some careful setting out for cutting the slots and cutting the slots with a tenon saw and chisel.
Cutting a notch in the sheer clamp for a stringer. The length of wood is a straight-edge
to guide the angles of the saw. The back face of the notch is cut at about 45 degrees to
minimise the amount of sheer clamp that is cut away in the process.

Completed notches for deck stringers, through bulkheads and into sheer clamps.
Deck stringers and hatch trimmers dry-fitted and ready for gluing.
Deck stringers are notched into sheer clamps and bulkheads. They will be glued in
after the hull skin inside the cuddy cabin has been faired and sanded.
This build will be completed during the winter and launch is being planned for the spring.

This design is not yet on our website and will appear there closer to completion of Kevin's boat. To see our range of designs, go to our desktop website or our mobile website.