Showing posts with label plywood boat kit. Show all posts

Friday, June 19, 2020

Didi 40cr2 Kit from Exocetus Marine

Exocetus Marine in UK develops and supplies kits for our radius chine plywood catamarans, with kits produced for the Dix 470 and DH550 cats. A kit is currently in development for the new Dix 430 catamaran. The kits are very comprehensive and can be customized to each customer's needs, from basic bulkhead kits through to inclusion of whatever equipment and materials the particular builder would like to be delivered in the shipping container with the pre-cut plywood and other timber.

I have written about the Exocetus Marine kits in earlier posts on this blog, from when development first started in 2012. They have come a long way since then, under the expert hand of owner Kevin Bream.

CNC Kits for 47ft Plywood Catamaran
Dix 470 Catamaran Kit Build in UK
Kit-build Dix 470 Plywood Catamaran
Plywood Catamaran Kits
More About Plywood Catamaran Kits
DH550 Kit Shipped to Southern Africa
Dix 430 Catamaran

The DH550 catamaran "Valerie", built in Durban, South Africa, and in charter service in the Seychelles, was built from a very comprehensive kit supplied by Exocetus Marine, which included solid timbers, epoxies, engines, hardware, electronics, porthole frames etc.
DH550 charter catamaran "Valerie".
The Dix 470 catamaran "Marram", being built in Australia, is a big amateur project. The components have all been cut from CNC cutting files developed and supplied by Exocetus Marine.
Dix 470 "Marram", a husband and wife amateur project.
Exocetus Marine is now expanding their range in a new direction. This harkens back to my origins in radius chine plywood designs with my Didi 38 prototype "Black Cat", which has spawned a large and expanding range of designs from 15ft to 55ft, spanning both monohulls and multihulls. The Didi 38 design itself expanded to the Didi 40cr and, most recently, the Didi 40cr2. It is the Didi 40cr2 that is the newest project by Exocetus Marine.
"Passion X", prototype of the Didi 40cr2 design, built as an amateur project in Australia.
As with their catamaran kits, Exocetus is developing a very comprehensive kit for this first expedition into monohulls. In doing so they have transformed my CAD drawings into a complete 3D model before extracting the components for cutting by CNC then testing for accuracy of build. In doing this they are building the boat as well, enabling preparation of complete building instructions to guide those who will follow to build the Didi 40cr2 for themselves.

These photos are a few from the build record to date.
Bulkhead example, with jigsaw joints, doublers fitted around stringer slots.
All parts are referenced for identification and assembly instructions.
Bulkheads set up on the building stocks.
Cockpit structure installed, bracing the whole structure.
Backbone with bevels and scarphs pre-cut.
Pre-cut opening for propeller shaft log.
Laminated keel floors.
Keel floors installed through backbone structure.
Stringers being installed. This is a tangent stringer, with a doubler on the outer face for joining the radiused skin above the stringer to the flat skin below.
Hull side panels jigsaw-jointed at ends of sheets.
Example from the interactive building manual for the DH550 catamaran. A similar manual will be supplied with the Didi 40cr2 kit.
Check back to this blog occasionally. I will update here on progress of the kit development and the construction of their boat.

For more information on our designs go to our main website or our mobile website.

Friday, January 24, 2020

Memories of a Trans-Atlantic Race

This week I was sent a photo that brought back good memories, 24-year old memories of our first Cape to Rio Race on "Black Cat", in 1996. It was sent to me by Gavin Muller, who was the youngest in our 5-man crew. He took it on the last night of our race, as we were sailing between our Brazilian landfall of Cabo Frio and the finish line off Copacabana Beach, Rio de Janeiro.
From left, Adrian Pearson, Brian Cole, Dudley Dix and Sean Collins. Sadly, two are no longer with us, the others are scattered around the world.
The Cape to Rio Race is 3500 miles of tradewind ocean racing, starting in Cape Town and finishing in Rio de Janeiro. A race like this breeds friendships that last a lifetime. Most of us were good friends before the race and the three weeks in close quarters in the middle of nowhere, in company of seabirds and the occasional fish or whale, cemented those friendships forever. Gavin was the odd-man-out at the start of the race, being much younger than the rest of us, but he too became a friend for life.
Gavin Muller repairing our light spinnaker.
Adrian Pearson (RIP) was my partner in "Black Cat". Brian Cole introduced us while I was building our boat for the race, bringing him in as crew. Later he joined me to co-finance the project.

Brian Cole (RIP) was the oldest in our crew, at 60. He was a director of North Sails Cape Town and a regular on the crew of my previous boat, "Concept Won". He joined us on this race as navigator for his first and only ocean-crossing voyage. His wife, Marion, was co-skipper with Judy Provoyeur of the all-lady crew of the Schumacher 41 "Kelly Girl", our closest handicap competition in the race. On handicap, they had to reach Rio more than 20 minutes ahead of "Black Cat" to beat us.

Sean Collins was a client many years ago for a rig redesign on his cruiser. He became a friend, sailing with me for many, many miles on "Concept Won". We raced together uncountable times in fully-crewed and double-handed races around the buoys and around the coasts of the Cape of Good Hope, quite justly also named "Cape of Storms". We had much experience sailing in mild weather and in those storms.

Gavin Muller, at 21, was not long out of college. His math teacher, an acquaintance and also a boat owner at Royal Cape Yacht Club, had asked me if I had a crew slot available for Gavin, who had previously sailed a Cape to Rio Race with him while still a school boy. Another friend of mine had to withdraw from the crew and Gavin slid into his spot.
Another of Gavin's photos. This one shows me in the bosun's chair working on the headstay foil, damaged by the spinnaker pole. The big cat watches over me.
"Black Cat" is the prototype of my Didi 38 radius chine plywood design. I designed her primarily for this race, starting to formulate the concept while racing to Rio in 1993 as navigator and sailing master on the Shearwater 39 "Ukelele Lady". I built her in my garden in Hout Bay, a suburb of Cape Town. The build took 2 years with help from my wife Dehlia, Sean Collins and another friend, Nigel Watkins, who didn't join us for the race.

Part-way through that race, with the nearest land (the Brazilian island of Trinidade) about 500 miles away, we had a close call with a boat of about 40ft that was sailing unlit on a moonless night. I was in my berth under the cockpit, dozing with my brain on alert as usual. Brian and Adrian were in the cockpit and I heard a discussion start, trying to identify something ahead of us in the dark. We were under spinnaker, averaging about 10 knots, so closing pretty fast. I joined them in the cockpit to see that we were on course to T-bone this wooden boat. Two wooden boats colliding in mid-ocean would not have been pretty. The skipper of the other boat suddenly appeared on deck, shining a flashlight on his mainsail. Within another 15 seconds we would have been past him and would have made much noise to advise him that he had missed out on the action of unidentified ships passing in the night. I suspect that he still holds those images in his head of our big cat spinnaker bearing down on him fast.

We figured from his course and position that he was possibly en-route from Cape Horn to Europe. Next morning on the daily fleet report I told of our near-miss. The story appeared in the Cape Town newspaper next day, although not entirely accurately reported. We were also the subject of the daily cartoon, the original of which now hangs proudly on my wall at home.
The cartoon drawn by Grogan for the Cape Argus newspaper.
We had not seen our competition "Kelly Girl" since the start but they were always close behind in the handicap race. We hadn't seen another boat for many days although the position reports showed that there were always others somewhere over the horizon. Trinidade was a mark of the course and, as we approached the island toward sunset one day, we saw "Kelly Girl" behind us on the horizon. After that we saw each other at least once a day.

A few days after rounding Trinidade we were sailing in 5000m of inky blue water that suddenly turned brown and murkey. We hadn't seen a seabird for a few days and had hooked nothing on our fishing lure, trailed for many days. At the same time the sky was full of birds and our lure hooked a long-fin tuna. Within 5 minutes we had three of them aboard before deciding to keep the lure aboard rather than have nature think us greedy. The truth is that, with one fish for dinner that night and the other two in the freezer, we could not cope with any more. Within an hour we were back into inky blue water and 5000m of water, having completed our crossing of the 60m depth of the Almirante Saldanha Sea Mount. In another million years or so maybe this will be another island in the Atlantic.

Meanwhile our race-within-a-race carried on with us sometimes ahead and other times "Kelly Girl" appearing out of a thunder storm ahead of us. Cabo Frio was our first landfall in mainland Brazil and we rounded that promontory abeam of each other and 100 yards apart. We finished about 3am that night, about an hour ahead of "Kelly Girl", with the 20 minute handicap advantage in hand as well. Another 4 years on, in the 2000 Cape to Rio Race that same boat was skippered by circumnavigator Anthony Steward, who finished about 20 minutes ahead of us. These two boats are very closely matched for ocean racing.
Relaxing in the Bay of Islands after the race.
Since that 2000 Rio Race "Black Cat" has crossed this ocean twice more, to total six Atlantic crossings. She has also raced the 1700 mile Governor's Cup Race from Cape Town to St Helena Island twice, including line- and handicap-honours in the 2014/15 race.

It is now 24 years that "Black Cat" has been sailing. She has nearly 100 sisters on the water or in build. She has also spawned another 16 performance designs in sizes from 15 to 55ft for a wide range of concepts. These range from monohull dinghies to trailer-sailers and large catamarans, even fast little gaffers. More than 500 boats are on the water or being built to this range of designs. Most are amateur projects, with builders producing impressive quality.
Didi 29 Retro, a gaffer with a great turn of speed.
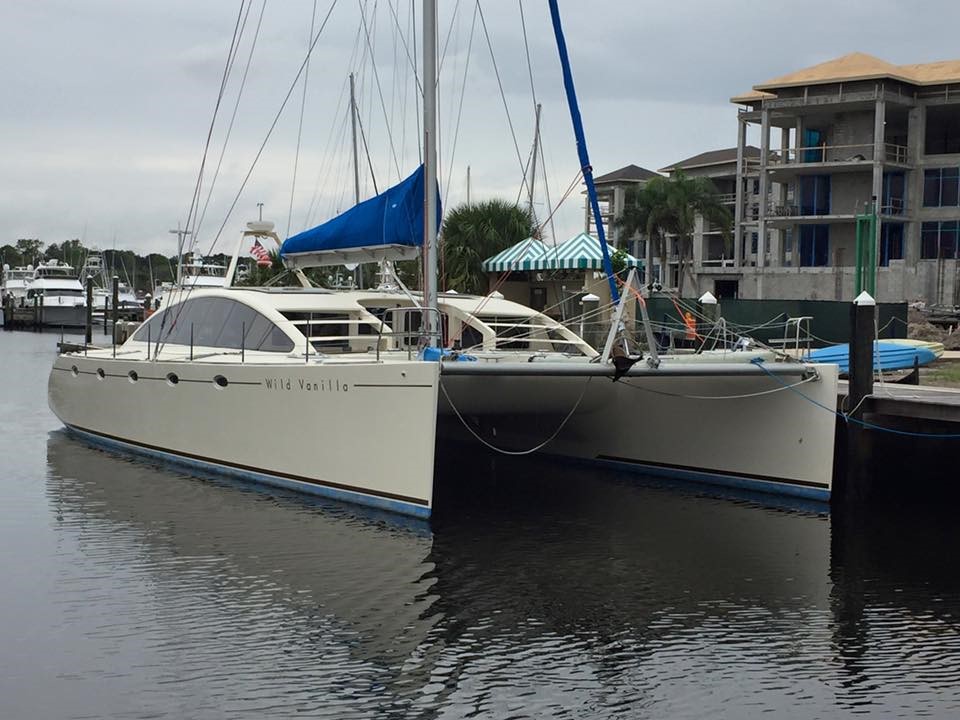
DH550, a very comfortable and eye-catching cruising cat.
Both of the boats above, as different as they may appear, are derivatives of the Didi 38 design. To see our other plywood designs go to https://dixdesign.com/plywood.htm. Or to see our full range of designs of all types and materials, go to our main website or our mobile website.

Wednesday, July 17, 2019

DH550 Catamaran "Valerie"

"Valerie" is the newest DH550 catamaran, launched in Durban, South Africa, a few months ago. Now she is in the Seychelles, awaiting her charter licence. Within a few weeks she should be licensed and available for crewed charter among these gorgeous Indian Ocean islands.

DH550 "Valerie" relaxing in an idyllic setting.
"Valerie" with Argie 15 as yacht tender.

A closer view.
Starboard aft cabin.
Galley on port side of saloon.
Settee on starboard side of saloon.
Inside helm and nav station.
Fast, comfortable sailing.
"Valerie" was built from a kit from Exocetus Marine in UK, who supplied a fairly comprehensive kit. It included CNC-cut components for hull, deck, bulkheads and interior joinery, as well as deck hardware, machinery, electrics and many other items.

"Valerie" will have a website in a few months. Until then I can forward any enquiries about chartering her to her owners.

To see our full range of designs go to our main website or our mobile website.

Thursday, October 25, 2018

Oppikat Junior Catamaran News

There is a lot of interest in our junior catamaran design, the 9ft Oppikat. It is built from a combination of cedar strip for the compound curved surfaces and plywood for bulkheads and flat surfaces. Some amateur builders have produced exquisite examples, showing beautiful craftsmanship that highlights their skills.
This Oppikat was built by Pavel Arzhevitin to a gorgeous standard.
We all have our own ideas about finishes, hardware layouts etc. so what one builder does to suit their own intentions for their boat will be different from another. That is part of the attraction of amateur boatbuilding, producing one-off craft that exactly suit our own needs.

The Oppikat was intended essentially as a boat for junior sailors, to have a boat of their own that has a good turn of speed and can give exciting sailing before moving up to bigger and more challenging boats. But time has shown that these little boats aren't only sailed by their intended lightweight skippers. The Oppikat has high-volume hulls for safety and fathers have sailed them, both by themselves and with junior.
Oppikat built by Frank Nagel, with his son sailing.
Oppikat can be built from plans only, which include full-size patterns of bulkheads and transom. Now we have added another two build options.

1) Build from plans and pre-cut bulkheads, cut by CNC router.

2) Build from plans and a wood parts kit that includes all plywood components, pre-cut by CNC router, plus bead and cove strips for the lower parts of the hulls and timber for all of the framing in the hulls.

These are available in USA but may be expanded to suppliers in other countries if requested. For USA buyers, go to our plywood kits pages for either computer or mobile devices.

I have also been asked numerous times over the years to draw a slightly bigger sister that can carry an adult or two. That is now on the drawing board and should be available in a week or two. Watch this blog for future news.

To see our full range of designs, go to our main website or our mobile website.

Sunday, June 4, 2017

Argie 15 Nearing Completion

It has been a long time since my last post about our Argie 15 project. Work has been going on but big life events have taken away from the time needed to write blog posts. The main event was a change in the status of builder Kevin  Agee, now our son-in-law after marrying our daughter Michelle last month.
Newly-married, our daughter Michelle and new son-in-law Kevin Agee.
OK, time to get life back to normal. The Argie 15 is nearing completion and looks very different from when you last saw it. It took its first road trip, on my Paper Jet trailer. The destination was my own garage, for painting.
Ready for preparation for paint.
After turning the boat upside-down, final inspection, masking the rub-rails and other bright-finished surfaces, blowing off the dust with a leaf blower then cleaning with acetone, it was ready for spraying to start.
First coat was a high-build epoxy primer, to give an easily-sanded layer to form the foundation for a good finish.
Next came a white primer. This was needed to cover the grey epoxy, which can cause blotchy problems with finish coats.
When I sprayed my Lotus, I changed the colour from the original red to yellow. I sprayed the yellow over a grey primer and found that yellow paint has problems covering grey. What initially looked like good cover is a bit green and blotchy in low-light situations. The green tone is the grey primer showing through and the blotchiness is caused by variations in the yellow film thickness. I must spray another coat over the car to get a uniform yellow colour. Lesson learned, we added a coat of white primer to the paint schedule of the Argie 15 to ensure good cover.
A coat of high-build epoxy primer also went onto the vertical surfaces of the cockpit because these will be gloss white. The horizontal areas will be beige non-skid, so a perfectly smooth surface was not needed.
The transom was to be white, so that was sprayed first, then masked off with paper before spraying the rest of the hull.
Completed hull painting, with yellow hull and white transom
The varnished rub-rails laminated from cedar and poplar set off the hull nicely. The holes through the hull sides are to drain the leeward side seats if any spray comes aboard when sailing in lumpy and breezy conditions.
 The new boat made its first public appearance by doing bar service at the wedding. It worked as a giant cooler, holding beers and soft drinks on ice for the wedding guests.

The other work that has been going on is building the spars. I am doing that work, having decided to make wooden spars using the birdsmouth method. In keeping with the varnished woodwork on the hull, I have made the mast and boom from alternating strips of cedar and poplar. I won't go into the details of building the spars in this post but will do that in later posts on my Boatbuilding Tips Blog. The Argie 15 plans show the mast in two sections, so that the rig can be stowed inside the hull. I could have made the mast in one length by scarphing the strakes into long lengths but elected to stay with the two-part mast. This allowed me to work with lengths that fit more comfortably inside a single garage.
Gluing a mast section using the bidsmouth method.
Mast sections and boom shaped and being epoxy-coated. The one closest to the camera is the boom, the other two being the two sections of the mast. The long mast higher up in the garage is my Paper Jet mast, built by a similar method.
Launch day is approaching. The sails have been made and hardware will soon start going onto the deck and rig.

See more of this and our other designs on our main website or our mobile website.

Saturday, March 18, 2017

Argie 15 Dinghy Next Stage

In my last post about his Argie 15 project, Kevin Agee closed in all of the seats. What remained was to tidy up the drains through the centre seat. This he did with an angle grinder to trim them flush with the bulkhead and the fillets against the hull skin.
Trimming the port drain, the starboard one still projecting
 from the seat.
The drains are neatly trimmed and Kevin called me in to help
 him turn the hull over. I got the lighter end.
Kevin at the heavier end. The slight V in the aft sections is
achieved by scribing half-way through the plywood from
the outer face.
Turned over and ready for glassing the outside of the chines.
The chines were glued with epoxy adhesive between the ties before they were
 removed. Now the gaps will be filled before the glass tape is applied.
Also going ahead are the rudder and daggerboard. This started by laminating blanks from strips of cedar and poplar glued with epoxy adhesive, to give a striped effect. Clear-finishing with varnish over fibreglass/epoxy brightens the colours, to give a very attractive finish.
The daggerboard blank, sanded smooth and ready for shaping.
Kevin laminated the blanks and cut the outline shapes, then gave them to me to shape the foils and cover with fibreglass/epoxy. I will cover that work in separate posts.

To see more of this and our other designs go to our main website or our mobile website.

Monday, January 30, 2017

Update on Our Argie 15 Project

Kevin Agee is working hard at our new Argie 15, completing epoxy coatings on the inside of the boat, including sanding and other tidying up to give a nice standard of finish. These smoothing tasks are worth doing all through the build, or the runs and bumps will accumulate into lumpy surfaces and rough edges.

A few years ago I was asked to do a talk to a yacht club meeting. The club members were building some sailing dinghies at the time, which they showed me. The plywood stitch-&-glue hulls had been built and epoxy-coated. Later, during my presentation, the members were looking through my photo albums of my own projects. The photos of the Paper Jet, with its mirror finish, brought a few questions. They wanted to know how I had achieved such a finish, using the same build method as their lumpy boats.
A finish to make any builder proud of what has been achieved. Get there by simply sanding out all imperfections on each coat before applying the next. This is not an Argie 15, it is the prototype of the Paper Jet.
The secret is to apply enough epoxy in each layer to do the intended job and no more than that, then to ensure that it doesn't dry with runs to spoil the surface. If the coating is too thick then it will run. If you leave the runs then apply the next coat, the runs will become accentuated by the next coat of epoxy and you will have even more runs. After three coats of epoxy the surface will be so lumpy that you may need an angle-grinder or a bucket of filler to smooth it out. It is much easier and more satisfying to just sand out all imperfections on each coat before commencing the next one. The epoxy being used for the Argie 15 build is MAS low viscosity epoxy. Being mid-winter, we are using the MAS fast hardener to shorten setting and curing times.
MAS low viscosity epoxy with fast hardener speeds up curing in the frigid winter temperatures.
The first coat will take the most epoxy because it will soak into the wood. Add more epoxy to areas that look dry until a thin layer stays on the surface. The second and third coats will need less epoxy because it won't soak into the already sealed surface.

The holes for the inspection covers have been cut. We have 15 of them in total for the boat, to get access throughout the inside of the hull. These under-seat spaces are not only buoyancy, they are also dry-storage compartments for clothing, food packages, tools etc. They need to be accessible for cleaning and to retrieve lost items; you don't want to have spots that even the longest arms in the family can't reach. I elected to use Viking 5" inspection hatches, which are currently in the mail. Kevin used a large hole saw to cut the openings. They can also be cut with a router fitted with a circle-cutting attachment or it can be done with a jigsaw. These latter two methods would be easiest done before the panels are glued into the boat but the hole saw method is easy enough to do in the boat.
Holes for access hatches (inspection covers) cut into all of the compartments.
The drains through the centre seat have also been installed. These were made from a length of 32mm ID PVC pipe that was cut in half lengthwise to make two U-sections. These have been glued to the bottom panel and then glassed over and epoxy-filleted. The ends project through the bulkheads and will be trimmed flush. Don't forget to paint your three coats of epoxy to the hull skin before gluing the half-tubes in place, don't leave this for later.
Drains passing through centre seat, glassed over and filleted.
Kevin has also been working on the mast step and partners, getting them ready to glue in when the hull is ready for them.
Mast partners on the left, mast step on the right.
For more on this and our other designs, go to our main website or our mobile website.