Showing posts with label plywood boats. Show all posts

Wednesday, July 17, 2019

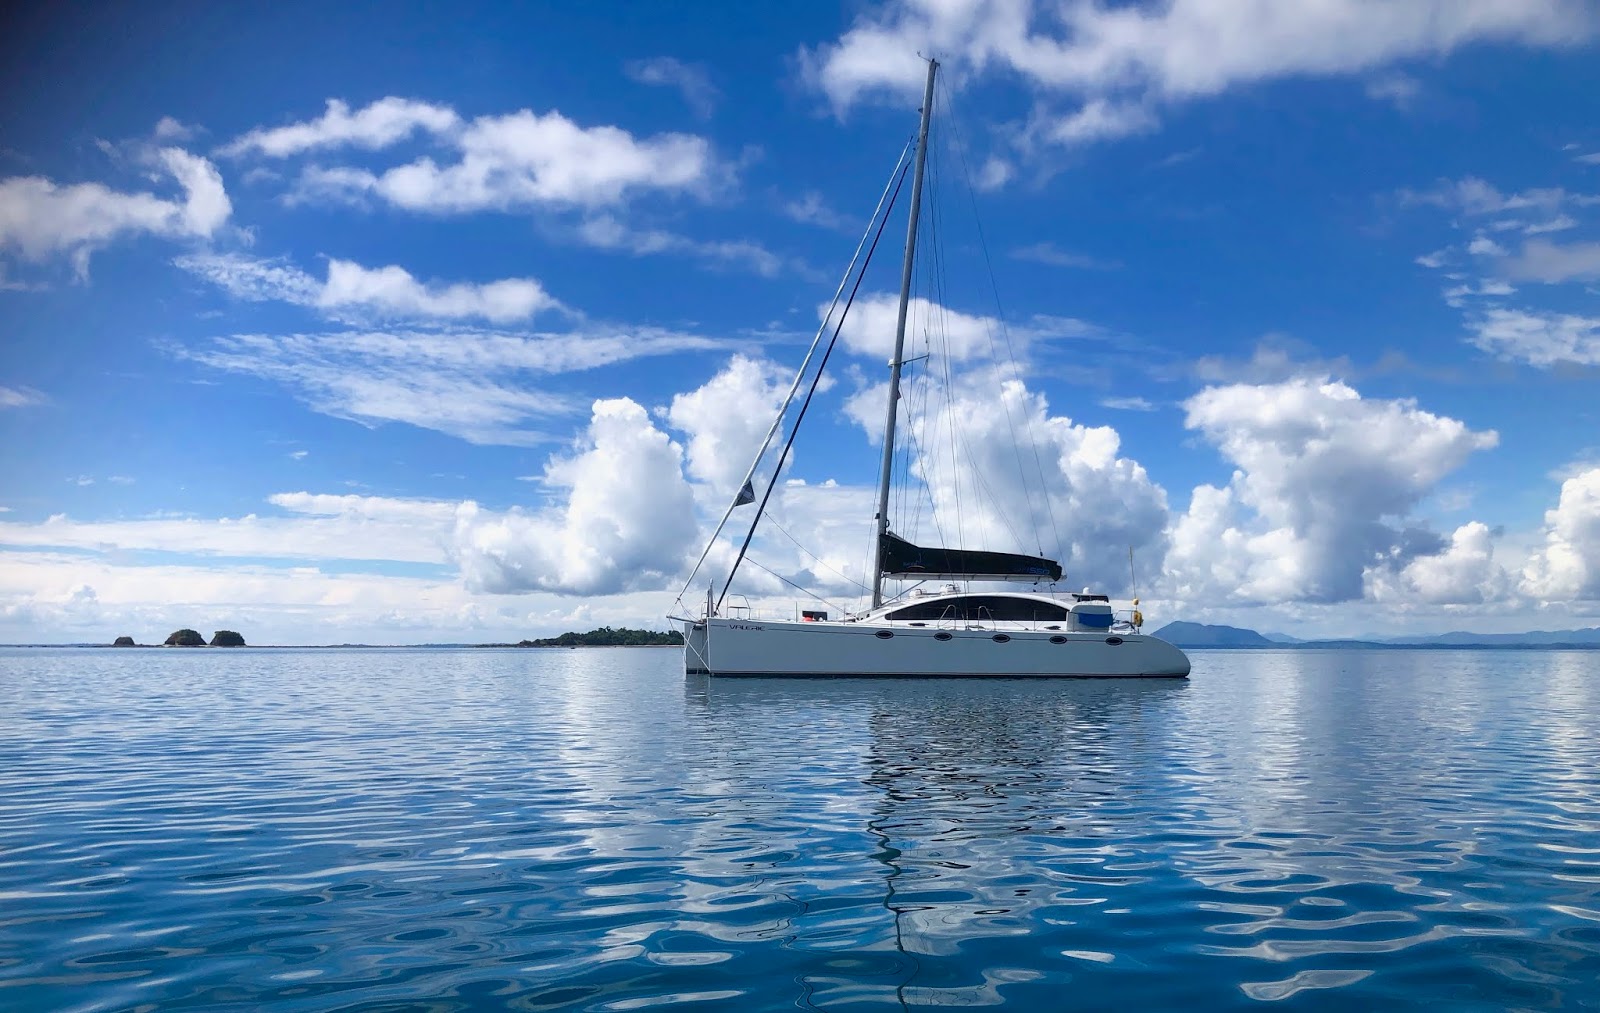
DH550 Catamaran "Valerie"

"Valerie" is the newest DH550 catamaran, launched in Durban, South Africa, a few months ago. Now she is in the Seychelles, awaiting her charter licence. Within a few weeks she should be licensed and available for crewed charter among these gorgeous Indian Ocean islands.

DH550 "Valerie" relaxing in an idyllic setting.
"Valerie" with Argie 15 as yacht tender.

A closer view.
Starboard aft cabin.
Galley on port side of saloon.
Settee on starboard side of saloon.
Inside helm and nav station.
Fast, comfortable sailing.
"Valerie" was built from a kit from Exocetus Marine in UK, who supplied a fairly comprehensive kit. It included CNC-cut components for hull, deck, bulkheads and interior joinery, as well as deck hardware, machinery, electrics and many other items.

"Valerie" will have a website in a few months. Until then I can forward any enquiries about chartering her to her owners.

To see our full range of designs go to our main website or our mobile website.

Wednesday, January 10, 2018

Framing the 26ft Sportfisherman

The 26ft sportfisherman project now has its building stocks and is ready for framing to begin. The frames have been built, most of them permanent and a few temporary. A boat in construction often needs framing to be more closely spaced than it needs in use on the water. Temporary frames fill in the gaps where needed to add rigidity or to help shape parts of the hull where wood won't naturally take on the form needed.

Before setting up that first frame we needed to know how level the rails were that are going to support the frames until the hull is ready to be turned over. There is no point setting up the first frame sitting hard against the rails then finding as you progress that it is the lowest point on the rails. Using a laser level and a long batten we compared heights all over both rails to find the high points. Plywood spacers were added to the rails at the first frame position to get it above the highest point on the rails. All other frames are lifted as needed on plywood spacers and/or wedges to get them to the correct level.
Spacers under frames to get them level. The legs are screwed to rails and frames are screwed to the legs.
For this design I aligned Station 1, a temporary frame, with the forward transverse frame of the building stocks. For simplicity this frame is set up accurately in that position, then all others are referenced from that same location. It is good to measure all from that one position to reduce the chances of longitudinal errors. If you set up each frame measured from the previous one, the incremental errors can easily add up to 1/2" or more of cumulative error over the length of the boat. If you make one big error, that error would carry through the rest of the boat. You would discover it eventually when you attempt o lower the girders into place and find that they don't fit. At that stage you would have to reset all frames to their correct positions, wasted time and energy that is saved by doing it correctly from the start.
Station 1 (temporary) is on the left, set up first, secured and braced. The one on the right is a permanent bulkhead, supported by a temporary base and with light battens holding it stable. The deep slots in the upper edge are for permanent plywood girders that will be dropped in later to stiffen both hull and deck. The girders have matching slots and will accurately space and align the tops of the frames. Legs secure the frames to the rails. 
The frames are set up vertical and level by using a plumb line hanging from a line above the centreline of the boat and a laser level. The laser should be self-levelling for accuracy and should be set up so that it can shine onto all frames at the same time. Now is the time that you will discover whether or not your accurately-drawn waterline and centreline are really at 90 degrees to each other, as they need to be. The waterlines on one side are set up level for all frames while setting up the frames, then checked on the other side. There will likely be some minor errors on the second side to correct. Lift or lower that side of each frame where needed, bearing in mind that the frame will rotate around the contact point on the other rail, so the centreline of the frame will also move a small amount. So, correct the waterline to suit the laser and the centreline to suit the plumb line simultaneously. After all frames have been adjusted, move the laser back to the first side and check that, then adjust if needed.

All of the frames have been set up, accurately positioned fore/aft by measurement along the stocks and set up vertically with the aid of the plumb line that hangs from the centreline above the boat and level with the aid of a laser level. The light-coloured plywood is temporary, the darker pieces are permanent.
In this photo the frames have all been set up, checked and checked again. The laser level is at left, clamped to a post on the router table. The light is shining on all frames onto the waterlines that were drawn accurately from the drawings.
The forward two frames don't extend to waterline, so the laser won't shine onto them. To set the levels for these two you can attach a batten to the plywood with the waterline marked on it, or you can set the spacers to the correct level before setting up the frames.
Here one of the girders has been lowered into its slots in the frames to check accuracy. Other girders are lying against the frames. They are scarphed into long lengths from plywood. 
The next post in this series will cover laminating the keel and stem.

This design is not yet complete, so is not on our pricelist. See our full range of designs on our main website or our mobile website.

Sunday, July 26, 2015

Wooden Boat Festival 2015

The 2015 edition of the Wooden Boat Festival in Port Townsend, Washington, happens 11-13 September. Organised by the Northwest Maritime Center, it is their premier event of the year, attracting hundreds of wooden boats of all description, a wide array of exhibits and with 120 speaker sessions on boating subjects.
Some of the boats at the 2014 Festival, Didi Cruise-Mini in right foreground.

I will be taking part in three sessions, one on each day of the Festival.

Friday 11th - 2:45pm - Yacht Designers Panel Q&A - six designers to field your questions about boats and designing them. A session like this highlights the variety of opinions held by different designers on boating issues.

Saturday 12th - 2:30pm - Plywood Boatbuilding Methods - PowerPoint presentation showing information and details of the methods for which I design, illustrated with drawings and photos of my own projects and those of amateurs who have built these designs.

Sunday 13th - 1:15pm - Plywood Kits for Larger Boats - PowerPoint presentation about constructing kit boats that are larger than open dinghies and kayaks. This will cover boats from a 21ft lapstrake plywood trailer-sailer through to a 55ft radius chine plywood cruising catamaran.
Paper Jet "Water Rocket" at the 2014 Festival

The Didi Cruise-Mini "Segue" of David Blessing will be there among the on-the-water boats but I don't know yet what other of my boats will be there.

When not involved with other things, I am happy to meet with builders or anyone interested in my designs. If you can't find me then visit the Didi Cruise-Mini. Whoever is in attandance at the boat should know where I am and how to contact me.

If you are in the Pacific Northwest, or able to get there, this is an event worthwhile visiting.

To see our designs, visit our main website or our mobile website.

Tuesday, March 24, 2015

Didi 29 Retro Progress

Bruce Mierke is building a Didi 29 Retro in Murphy, North Carolina. Bruce is a professional boatbuilder, building her for himself and progressing nicely. He has now completed the hull and it will be turned over in a few weeks.

This design is based on the Didi 26, modified to create a more classic image. Carrying a choice of rigs, the squaretop Marconi rig below and two gaff rigs further down the page. It is a radius chine plywood design, round bilge from plywood and can be built from plans or a CNC kit. Although Bruce is a professional builder, I developed this construction method primarily for amateurs and they have built many boats to this range of designs.
Marconi rig of Didi 29 Retro
Here are the latest photos from Bruce, showing the beautiful standard of finish that he has achieved.
Beautiful hull finish.
Two gaff rigs, racing at left and cruising at right.

For more info on this and our other designs, visit http://dixdesign.com/

Thursday, March 5, 2015

Yachting Monthly Capsize Video

Yachting Monthly have a very interesting  video of a capsize test on their YouTube Channel. I only became aware of it yesterday when it was highlighted by Scuttlebutt Sailing News.

Many have read the accounts that I have written about our capsize experience on the Didi 38 "Black Cat" in the Cape To Rio Race 2014. It is not possible to visualise what it is like to be there in that situation, even if you sit inside your boat and try to imagine it turning around you but this video goes a long way to help visualise it. It is not fully realistic because the roof stays at the top as the boat rotates, so the world is rotating around the boat rather than the boat rotating within the world around it. To provide better visualisation the camera needs to stay upright while the boat goes upside-down.

Bear in mind that this test is in flat water and the boat is rotated quite slowly from upright to upside-down, then rights itself quickly. Normally a capsize will happen in seas that are large and confused, so it is a much more violent process than seen in the video, with the boat being thrown in confused directions while it capsizes. Despite that, it is worth watching, to see the way that crew, equipment, etc was moved around the cabin and to see just how much water came in even in that still water.

It is not an experience that I would recommend to anyone, yet it is an experience that I am glad to have had and to have survived.

It also validates the toughness of the methods of construction that I have used for these plywood designs, that "Black Cat" came through with minimal damage.

To see our range of designs to carry you across the dam or around the world, please visit http://dixdesign.com/