Showing posts with label Plywood sailboat. Show all posts

Friday, August 17, 2018

Update on 50ft Catamaran in North Carolina

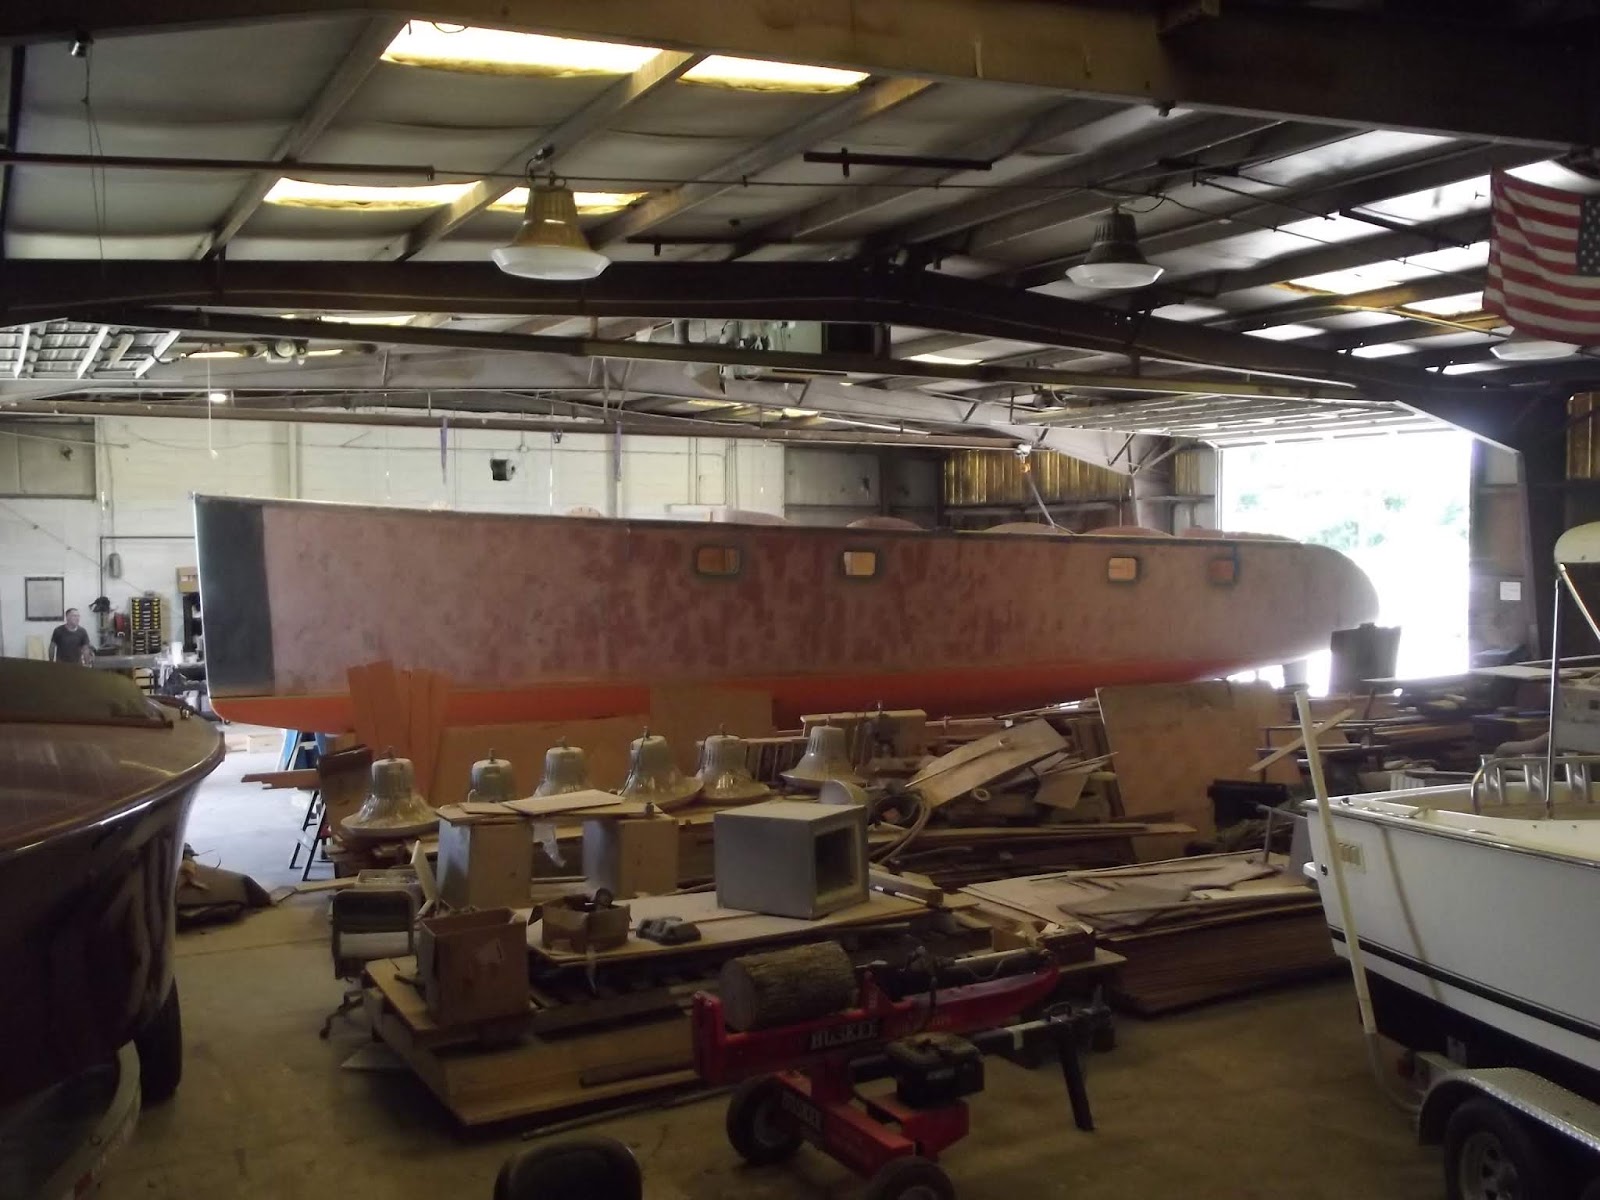
I visited the 50ft catamaran build by CRW-Con in Edenton, North Carolina last week. The first hull has been turned over and work has started on the second hull. The photos and captions tell the story.
Outboard view of the port hull. The hull has been sheathed with a layer of 1708 glass, then faired.
Inboard view of the starboard hull. The bulkhead horns projecting from the hull are for scarphing to the bridgedeck bulkheads.
Bow view. To the right is the long spar table for scarphing timbers into the hull-lengths needed to install in one piece.
Stern view, with the boarding steps taking shape. Rudder and P-bracket already installed.
Bulkheads being set up on the stocks for the starboard hull
View looking forward inside the hull.
Looking aft.
Cruising keel.
Composite chainplate being formed on plywood panel. This is the first panel that will be fitted onto the hull framing, then the others will be fitted working toward bow and stern. 
Close-up of the incomplete composite chainplate. The carbon spreads the loads down into the hull skin and structure and the shrouds are attached in the gaps with soft lashings. 
Faired-in opening for flush-fitting porthole.
Formed opening for flush-fitting escape hatch, The boxing over it is part of the 45 degree splayed panel that will connect the underside of the bridgedeck with the inboard hull side.
This boat is a modified version of out Dix 470 radius chine plywood catamaran design, stretched to 50ft. Both are sisters to the DH550.

To see our full range of designs go to our main website or our mobile website.

Monday, January 30, 2017

Update on Our Argie 15 Project

Kevin Agee is working hard at our new Argie 15, completing epoxy coatings on the inside of the boat, including sanding and other tidying up to give a nice standard of finish. These smoothing tasks are worth doing all through the build, or the runs and bumps will accumulate into lumpy surfaces and rough edges.

A few years ago I was asked to do a talk to a yacht club meeting. The club members were building some sailing dinghies at the time, which they showed me. The plywood stitch-&-glue hulls had been built and epoxy-coated. Later, during my presentation, the members were looking through my photo albums of my own projects. The photos of the Paper Jet, with its mirror finish, brought a few questions. They wanted to know how I had achieved such a finish, using the same build method as their lumpy boats.
A finish to make any builder proud of what has been achieved. Get there by simply sanding out all imperfections on each coat before applying the next. This is not an Argie 15, it is the prototype of the Paper Jet.
The secret is to apply enough epoxy in each layer to do the intended job and no more than that, then to ensure that it doesn't dry with runs to spoil the surface. If the coating is too thick then it will run. If you leave the runs then apply the next coat, the runs will become accentuated by the next coat of epoxy and you will have even more runs. After three coats of epoxy the surface will be so lumpy that you may need an angle-grinder or a bucket of filler to smooth it out. It is much easier and more satisfying to just sand out all imperfections on each coat before commencing the next one. The epoxy being used for the Argie 15 build is MAS low viscosity epoxy. Being mid-winter, we are using the MAS fast hardener to shorten setting and curing times.
MAS low viscosity epoxy with fast hardener speeds up curing in the frigid winter temperatures.
The first coat will take the most epoxy because it will soak into the wood. Add more epoxy to areas that look dry until a thin layer stays on the surface. The second and third coats will need less epoxy because it won't soak into the already sealed surface.

The holes for the inspection covers have been cut. We have 15 of them in total for the boat, to get access throughout the inside of the hull. These under-seat spaces are not only buoyancy, they are also dry-storage compartments for clothing, food packages, tools etc. They need to be accessible for cleaning and to retrieve lost items; you don't want to have spots that even the longest arms in the family can't reach. I elected to use Viking 5" inspection hatches, which are currently in the mail. Kevin used a large hole saw to cut the openings. They can also be cut with a router fitted with a circle-cutting attachment or it can be done with a jigsaw. These latter two methods would be easiest done before the panels are glued into the boat but the hole saw method is easy enough to do in the boat.
Holes for access hatches (inspection covers) cut into all of the compartments.
The drains through the centre seat have also been installed. These were made from a length of 32mm ID PVC pipe that was cut in half lengthwise to make two U-sections. These have been glued to the bottom panel and then glassed over and epoxy-filleted. The ends project through the bulkheads and will be trimmed flush. Don't forget to paint your three coats of epoxy to the hull skin before gluing the half-tubes in place, don't leave this for later.
Drains passing through centre seat, glassed over and filleted.
Kevin has also been working on the mast step and partners, getting them ready to glue in when the hull is ready for them.
Mast partners on the left, mast step on the right.
For more on this and our other designs, go to our main website or our mobile website.

Wednesday, January 4, 2017

"Black Cat" Rio Race Report #1

Skipper Dave Immelman sent me his first report today on their race thus far.

"Sorry it has taken such a long time to get back to you. We have been a bit busy. The start was mad. It was 30 knts in the Paarden Island corner and a tight reach to Milnerton and on to Blouberg then off. I have made the call to go north and to be conservative in the first few days. As it now seems with Dark Matter, Wow out and Trekker being scuttled I think it has been a good call for our 20 year old lady.

We are now the most northern boat in our  fleet and I want to see what the next grib says as there seems to be something strange happening to our SW. A front or maybe a split low. Will keep you informed. BC is behaving beautifully if a little heavy.  We have topped out at 22.6 knts and I am happy with the 200 plus miles per day. Now comes the long haul. Keep the trim up keep the speed up and hope to the high does what we want. I am not sure why the rest followed Black Pearl as they can make their own wind. But it seems too far south for them. We need to find it.

Anyway keep well and I will write soon."
"Black Cat" leaving Table Bay as seen from the kitesurfing beach at Blouberg. Photo Robin Schultz
Dave Mentions "Black Cat" being a bit heavy. This is because they have 6 crew, 1 more than we have had in previous races. Of course this means extra weight of the additional crew plus gear and stores, all needing more water to be pushed aside for the boat to pass through. Despite that, they have matched the best speed that we have attained in previous races.

It will be interesting to watch the relative progress of the various boats as the race goes on. The northern course has more distance but also the potential for more wind, so more speed. All courses will converge on Cabo Frio, closest landfall on the Brazil mainland.

Sad news from the race is the sinking of "Voortrekker 11" due to catastrophic rudder failure. Without news of exactly what happened, I wonder if she hit something that caused the damage. We will hear when the crew are safely back ashore. Happily there was no loss of life.

Friday, December 16, 2016

Argie 15 Framing

It has been pretty cold here the past few days, with winter starting to bite. Today the high temperature was just on freezing. As it grows colder over the next few weeks, a snug workshop is a good place to be spending productive time.

Kevin Agee is spending most evenings in his workshop, working on the Argie 15. Current tasks are fitting the framing for the seats and the transom doubler.

If you are fortunate enough to source timber longer than the hull, you can do the side stringers each in a single length. For the rest of us, it is necessary to join two pieces together to get the full length. This is done by scarphing (or scarfing or scarph-jointing) them. Each joint is done by cutting or planing the ends to be joined at an angle to form sloping mating surfaces. For an application like this and using modern adhesives, the slope angle need not be more than 1:6, so for timber 20mm thick the joint would be 120mm long.
One half of the scarph joint. This was cut on a saw but it could also be done with a jack plane.
The two pieces to be joined, dry-fitted to check accuracy.
The joint has been glued and here is shown being glued into the hull with temporary screws to hold the stringer until the glue has cured.
Stringers are glued in along both sides to form landings for the seats against the hull sides. Edge frames are also glued to the bulkheads to support the transverse seat edges.
Stringers fitted full length of both sides to form landings for the seats.
Edge framing being glued in for transverse seats.
Working neatly all the time will ensure a good finished product. This joint is an example, no scrappy edges, nicely filleted internal angle, all contact surfaces glued for a solid joint. 
View into the structure at the stern. The extra plywood layer on the centre of the transom is a doubler to strengthen it for the rudder pintle fittings. The notches in the tops of the transverse frames are for half-jointing the seat stiffeners. Those will be added in a future post.
You can see in all of these photos just how neat Kevin's work is. This is important if you are to have a really nice boat at the end of the project. If you don't think that you can't work to this standard, consider that Kevin is an amateur boatbuilder, not a professional. He is working with normal hobbyist woodworking tools. He has only built one previous boat, his own Inlet Runner 16.

To see more of our designs, go to our main website, our mobile website or our Flickr albums.

Sunday, November 20, 2016

Update on DS15A Project


The DS15A (Didi Sport 15 Adaptive) is the same hull as the DS15, modified to accommodate the needs of handicapped sailors. The prototype is being built in Santa Cruz, California. This plywood prototype will be used as the plug to make moulds to produce composite boats to order.

The hull has progressed to the stage that it is stable enough to be removed from the building stocks. It has been turned over so that work can be done on the deck along with completion of the hull.
Hull lifted off building stocks. The upper side panels haven't been fitted yet.

The hull is suspended on ropes while the support cradle is slid in under it.

Settled in her cradle and ready for work to continue.

3D rendering of the DS15A, a modern sportboat for sailors with special needs.
Hardware layout for the DS15A , with most controls operable from either seat.
To see our full range of designs, go to our main website or our mobile website.


Thursday, November 17, 2016

Winter Project Time Again

That time is coming around again, for the northern hemisphere. Winter has a charm all of its own, with festive occasions, family gatherings, giving and receiving gifts, having fun in the snow and snuggling by a roaring log fire with eggnog. Then there are those times of being trapped inside, when nerves begin to be frayed by cabin fever after all of the Scrabble and other board games have worn out their appeal and you have run out of episodes of that TV series that you have binge-watched for 36 hours straight.

That is when it helps for Dad to have a project to work on in his man-cave that does double-duty as a workshop. A small boat is a great project for those times, creating something of value for the family to enjoy when warmer weather returns, while also giving opportunities for quality time working together and developing new skills that will be of value in the future.

We have a few boat designs that are ideally-sized to be built in a small space, some simple and quick to build and others more demanding of skills, time and financial resources. Here is brief info on all of them.
This 8ft Dixi Dinghy was built by Leslie Koen. It has a sailing rig option as well
This 9ft Oppikat was built by Frank Nagel for his children
This Argie 10 was built by schoolboy brothers while Dad was away on a business trip.
Challenger 13 built by Jonas Klimantavicius
Paper Jet built by Andre Siebert
Didi Sport 15 built by Jim Foot.
Argie 15 built by Tarquin Morkel
Lynnhaven 16 built by Mikhail Andrukov
Inlet Runner 16 built by Kevin Agee.
Time to sharpen your saws, chisels and planes, buy in some marine plywood, Douglas fir and epoxy, then get to work preparing for next summer. You will also need the plans, which can be ordered from our pricelist.

See more about these and our other designs on our main website or our mobile website.

Thursday, October 27, 2016

Sailing Report on Didi 29 Retro

"Arabella", the Didi 29 Retro built by Bruce Mierke was launched in Oriental, NC, last week. Bruce has sailed her a few times and will now take her inland to Lake Lanier, GA. Early next year she will move to Clearwater, FL, before returning to Oriental in the spring.

Bruce has reported some impressive sailing, some of it by himself and some with two crew. He doesn't have an asymmetrical yet, so the top speeds are still to be experienced.

The first sail was in light winds, strengthening a bit during the sail. In 4 knots of breeze he recorded 3.1 knots of boat speed. In 9 knots she was doing 5.6 knots on a tight beat of 30 degrees. Falling off to 45 degrees "she screamed" (no speed reported).

The next sail was with two friends in winds from 10-15 knots. To windward in 13 knots they were doing 6.75 knots under Yankee and jib on a beat and 9.25 knots on a beam reach. "I can see me putting the 1st reef in main around 16 kts wind. But no matter what point of sail or combination of sail the helm is almost neutral, great sailer."
"Arabella" on the Georgetown Wooden Boat Show recently.
The next sail was by himself again, in 15 knots. He sailed next to a J boat of about the same size for 5 miles, matching it for speed and heading. Eventually the skipper of the other boat yelled across, asking what the hell kind of gaff rig boat she is.

Bruce has the cruising gaff rig and commented that the racing rig will be a bit of a handful. That is exactly what was requested by the man who commissioned the design. He wants her for Caribbean classic racing, expecting to have a full crew to ballast the rail. In that configuration or the 3rd option, a Marconi rig with squaretop mainsail, she will be very quick.
Marconi rig of the Didi 29 Retro
No sailing photos yet, I will post those when I have.

To see our other designs, go to http://dixdesign.com/ or http://dixdesign.com/mobile.

Saturday, October 15, 2016

Didi 29 Retro at Georgetown Show

Bruce Mierke has built his custom Didi 29 Retro to a gorgeous standard. He is exhibiting her on the Wooden Boat Show in Georgetown SC this weekend. If you are in the area and want to ogle some beautiful craftsmanship, Bruce is there to chat about her.
Didi 29 Retro "Arabella" hits the road for Georgetown
"Arabella" on display in Georgetown.
After the show Bruce will trail "Arabella" to Oriental NC for launch and sail tests.

Congratulations to Bruce for a beautiful build.

Thursday, July 21, 2016

Didi Sport 15 Adaptive - Sportboat for those with Handicaps

I have written in previous posts about the Didi Sport 15, aka the DS15. You can see one of those posts at this link or use the search window to view the many other posts.

This design caught the attention of two sailors in Santa Cruz, California. George Arthur and Luc de Faymoreau are involved with an accessible sailing program, helping sailors with disabilities to get afloat and sailing. They asked if it would be possible to redesign the DS15 to be suitable for disabled sailors and still have good performance.

The resulting design process has produced a specialised version of the DS15, using the same hull and foils as the base platform but with modified deck and sail plan. The name of the new design is the Didi Sport 15 Accessible, aka the DS15A. We don't yet have a design page for it on our website, that will come with time.
The DS15, basis for the new accessible boat
The deck modifications are to allow two sailors to sit in tandem in secure seats. The crew are seated in a narrower cockpit that allows them to brace themselves against solid structure when they feel the need, or to lean against something solid. The cockpit has low comfortable coamings that crew can hook an arm or an elbow onto, to hold themselves to windward if they want. Severely handicapped or weak crew can be strapped into the seats with harnesses if needed, to assure their safety.
3D Image of the DS15A accessible sportboat.
The rig has been reduced in power because the crew will not have the benefit of the stability advantages from mobile crew and single or twin trapezes. The ballast bulb on the daggerboard will be standard equipment rather than an optional item as with the DS15. It has a smaller asymmetrical spinnaker as well, on a shorter retractable bowsprit, for more advanced sailors in the program.
DS15A sail plan, reduced power but still exciting.
Sail controls are all led to the two seats, with camcleats on the sidedecks or cockpit sole, to share boat handling functions between skipper and crew. Some controls can be operated from either seat, to help with sail training or to better serve crew with different disabilities. Steering is by means of joysticks mounted in front of each seat, driving cables that are connected to the tiller.

This boat is not only for those with physical handicaps though. It is also well-suited to those who feel that they no longer have the agility or fast reactions demanded by a powerful boat like the standard DS15. It is also less intimidating to many wives and other less adventurous people who would still like to get out onto their local sailing waters with less fear that their thrill-seeking partners are going to scare the daylights out of them.

The first boat is about to start construction in Santa Cruz, being built from a plywood component kit, accurately cut by CNC router and shipped from our kit supplier on the East Coast. Construction is radiused chine plywood, giving a round bilge hull that is within the abilities of amateurs. From this first boat they will make moulds, whereafter fibreglass boats will be produced for the use of their own program and to fill orders from other programs and individuals.

We will also sell the design on the same basis as applies to the DS15, so it will be available as plans only, plans with full-size patterns or plans with a CNC kit.

I look forward to seeing the first of these versatile boats sailing. I will update progress with future posts on this blog.

To see our other designs, go to our desktop website or our mobile website.
Monday, February 22, 2016

Wide Stern Version of Didi 40cr

David Edmiston in Australia wanted to build our Didi 40cr design but he wanted some changes. He wanted a competitive racer that he could build himself using basic materials and amateur methods. Our radius chine plywood design fitted his needs well but he needed some modifications. These included a broader aft deck with T-shape cockpit. This change, with the underbody unchanged, increases flare in the topsides aft.
David's hull with the flats skinned and the radius in progress.
David is progressing well with his build and turned the hull today, with the help of friends. He constructed a strong purpose-designed framed canopy over the boat to give shelter while building and he used this to lift the hull and support it while turning, with the slings shackled to the tops of the posts.

The hull is supported by the yellow slings and is being turned with a chain block.
David has built much of the interior as part of the hull construction. I built most of the interior of the Didi 38 prototype "Black Cat" upside-down before skinning the hull. It is an interesting process, needing some different thought processes to make sure that everything turns out as intended. It has advantages in that shelves etc. can be cut a little oversize and allowed to project slightly through to the outside of the hull, then trimmed off with a plane for a perfect fit before fitting the skin.
This photo isn't inverted, this shows the saloon and nav station, built upside-down.
David's hull-turning went well, finished by celebrating with a bottle of bubbly.
She's over, showing off her broader stern and T-shape cockpit.
The saloon right-way-up, with a tarpaulin for protection until the deck is skinned.
David inside his newly-turned hull, ready to go to work on the deck.
David is documenting his build on his own blog, at http://3gwiz.com.au/passion_wp/?p=1238, where you can follow his progress through to launch.

To see more of our designs, go to our desktop website or our mobile website.